Deploying Apollo GraphQL server to NodeChef cloud hosting
-
1Setup a NodeChef application
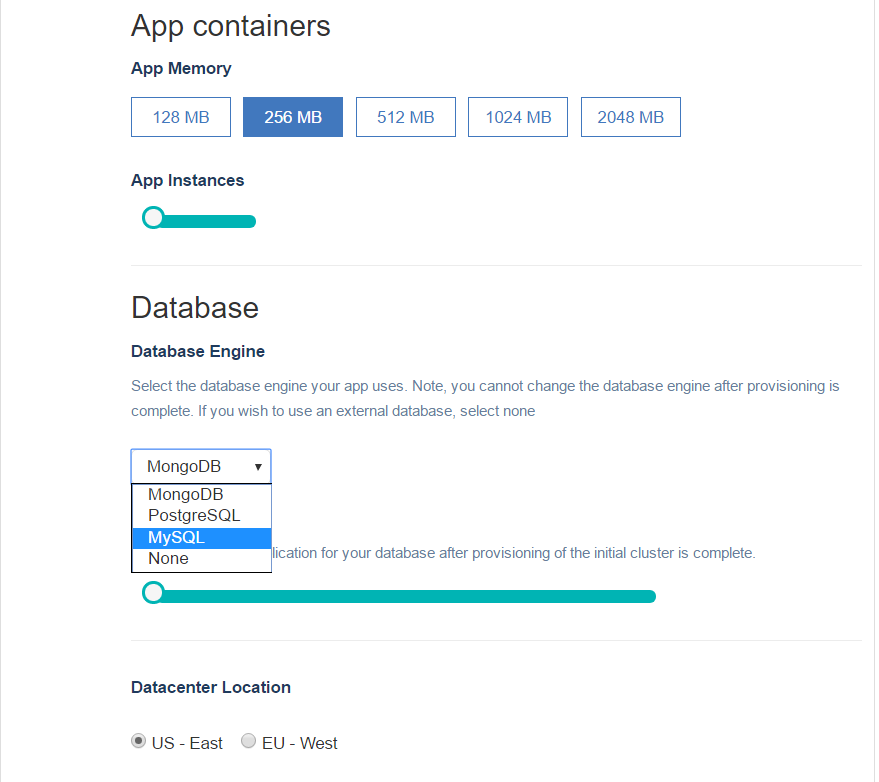
Log in and navigate to the Dashboard. Click on deployments and complete the form. You will be required to select the size of your container and the region where your cluster is to be hosted.
Once the cluster is provisioned, a URL will be assigned to your project which will be displaced on the dashboard.
- 2Prepare your app for deploymentserver.listen({ port: process.env.PORT || 4000 }).then(({ url }) => { console.log(`🚀 Server ready at ${url}`); });
Remarks
For NodeChef, projects can be set up using any of the apollo-server HTTP variants (like express, hapi, etc).
Applications deployed to NodeChef must reference the environment variable "PORT" as shown above when calling server.listen. This allows your application to accept incoming connections on the port assigned to your application. If you skip this step, your application will not work.
- 3Deploying your GraphQL server.
You can deploy your project to NodeChef cloud hosting by uploading your project folder as a zip, using GIT or the NodeChef CLI.
Deploying your GraphQL server by uploading your project folder.You must first zip all the contents in your project folder or use a tar archive with gzip compression to bundle all the files in your project folder. You can then upload this bundle.
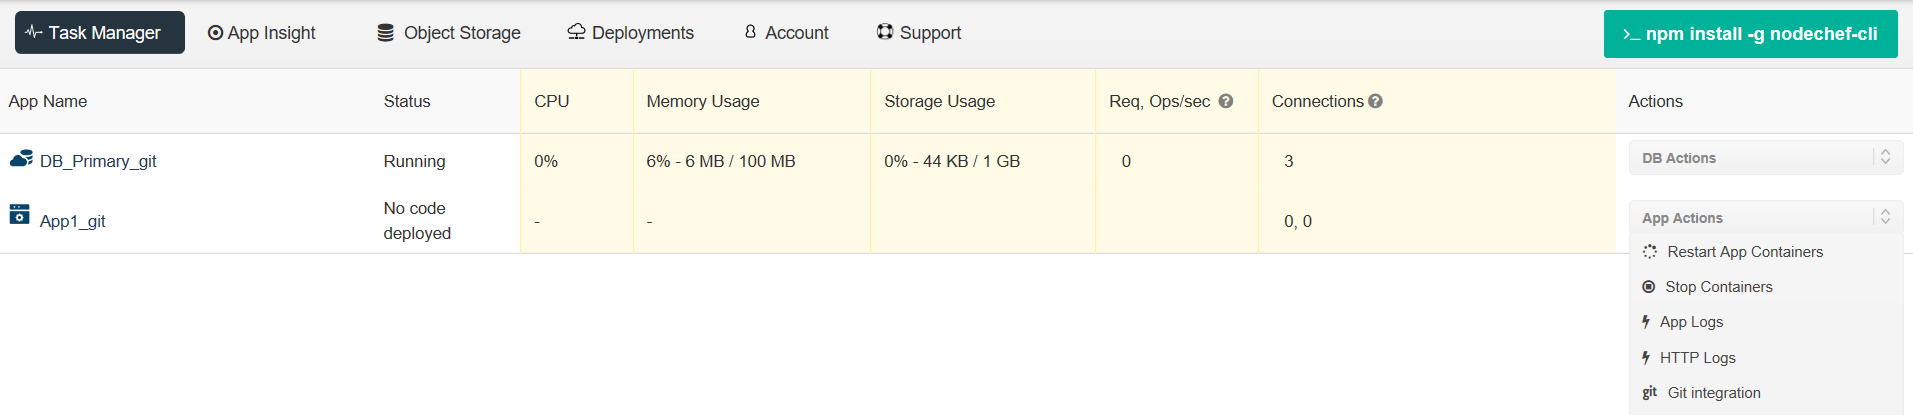
The zip or tar.gz archive cannot exceed 256 megabytes in size. You can always find the form to upload your project from the dashboard by navigating to the task manager → App actions → Upload code.
To speed up the deployment, do not include your local node_modules folder as part of the archive. Also do not include any hidden .git folders as part of your archive.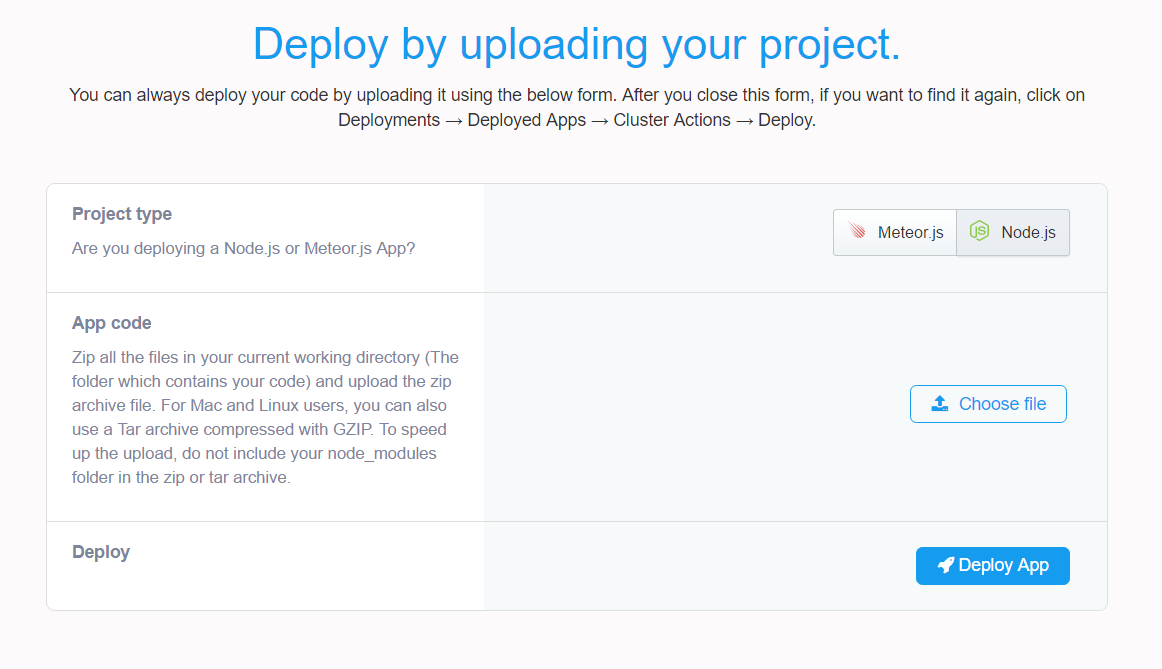
Once you click the Deploy app button, you should be able to see the status of the deployment from the progress indicator which is displayed right below the Upload form.
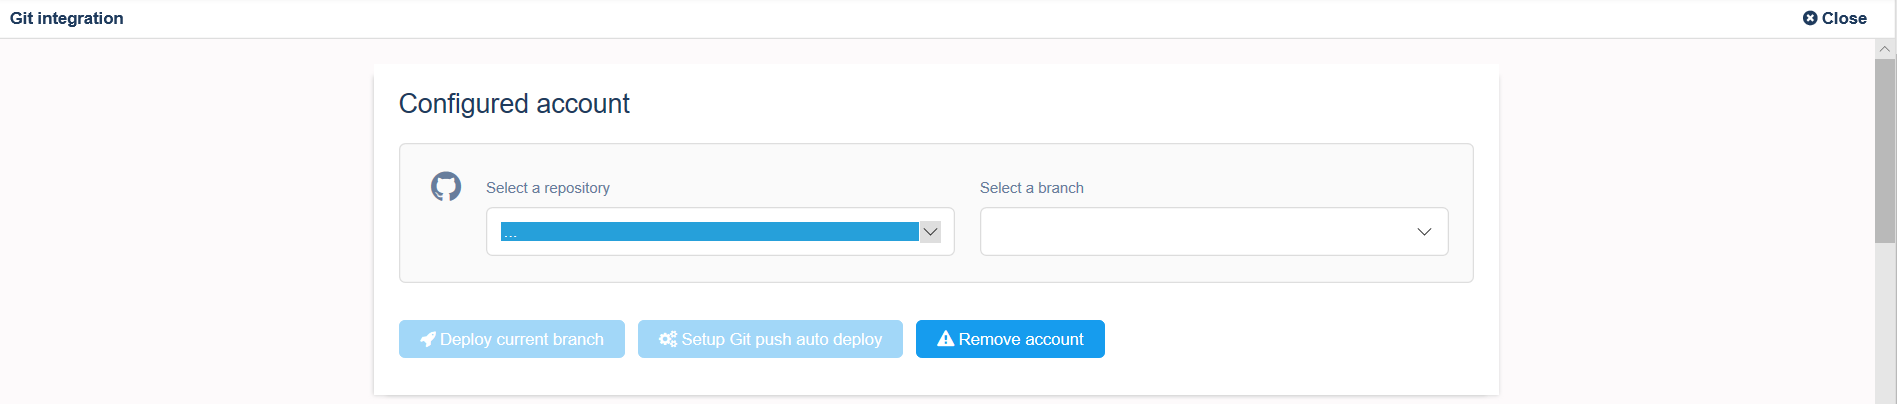
Deploying your GraphQL server from your GitHub, GitLab or BitBucket repository.Firstly, if you did not sign up for a NodeChef account using a GIT repo provider, you must authorize NodeChef to access your GitLab, GitHub or BitBucket account. You only have to do this once per NodeChef account. Click “Connect to (repository)”, a shown below to start the authentication.
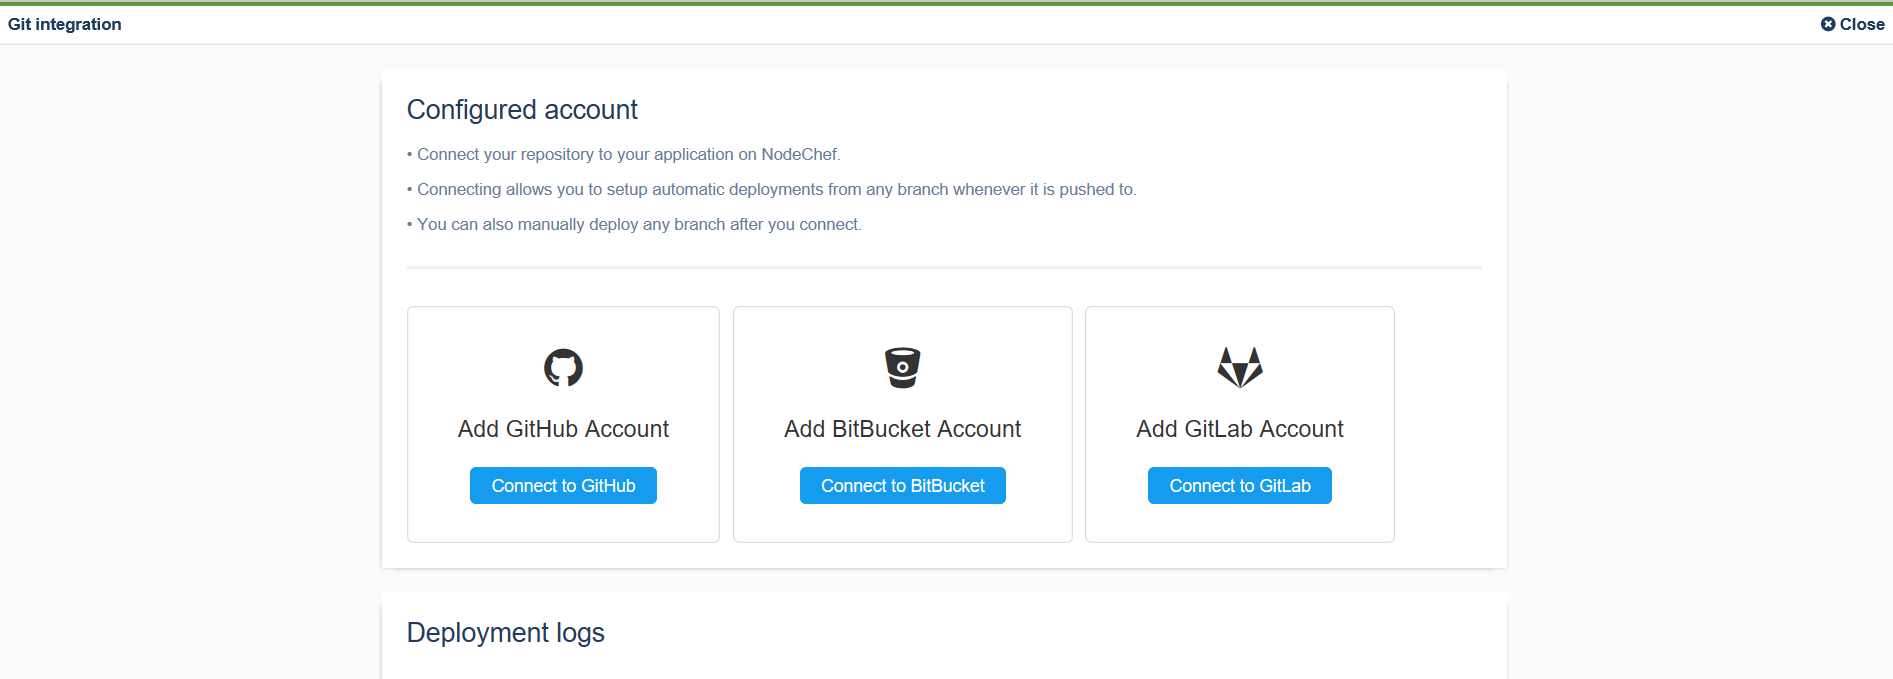
After you link your Account to a Git repo, you can selectively deploy from branches as well.
Deploying your GraphQL server using the NodeChef CLI.Install the NodeChef CLI from npm as showm below:
npm install -g nodechef-cliCD into your project folder and use the below command as seen below. You will have to login from the command line to deploy or use a deployment token if you generated one from the dashboard.
// Log in using email and password instead of a deployment token. nodechef login prompts for your credentials nodechef login nodechef deploy -i name_of_your_graphql_app