Step by step guide to deploy your Node.js app
-
1Installing the NodeChef CLI
Make sure Node.js is installed on your computer which should be the case if you are deploying Meteor.js or Node.js.
Install the CLI by running the below command:
npm install -g nodechef-cli - 2Prepare your app for deployment
Generate a package json file in the root directory of your application files. By default, the nodechef platform executes your code using the latest node js version. To specify a different version, use the "engines.node" attribute in the package.json file. Note you must specify the version explicitly. eg: "node" : "0.10.41". By default, the entry point of your application is the index.js script. To specify another script as the entry point, use either the "main" or "scripts.start" attribute.
On deployment, your local node_modules folder is not included in the zip package uploaded to the server. Modules from your package.json are cached on the build server for faster builds.
You can retrieve the Network address to use for the the listening socket from the environment variables process.env.PORT and process.env.BIND_IP. Hardcoded port numbers will not work on the nodechef platform.
Express.js example:
app.listen(process.env.PORT || 3000);
Listening using http:
http.listen(process.env.PORT || 3000, function() {})Working with NPM scripts
By default to start your application NodeChef searches for a scripts.start in your package.json. In case you want to customize your build, you can also include a postinstall script as well which NodeChef will run after running npm install
In step 5 we will show you how you to start your app with another script other than the start script. This is useful in cases where the same code base serves different functions such as a background worker and also the web app layer
"scripts": { "start": "node app.js", "worker": "node jobs.js", "postinstall": "echo 'meow'" <--- Will run after npm install }Connecting to your database
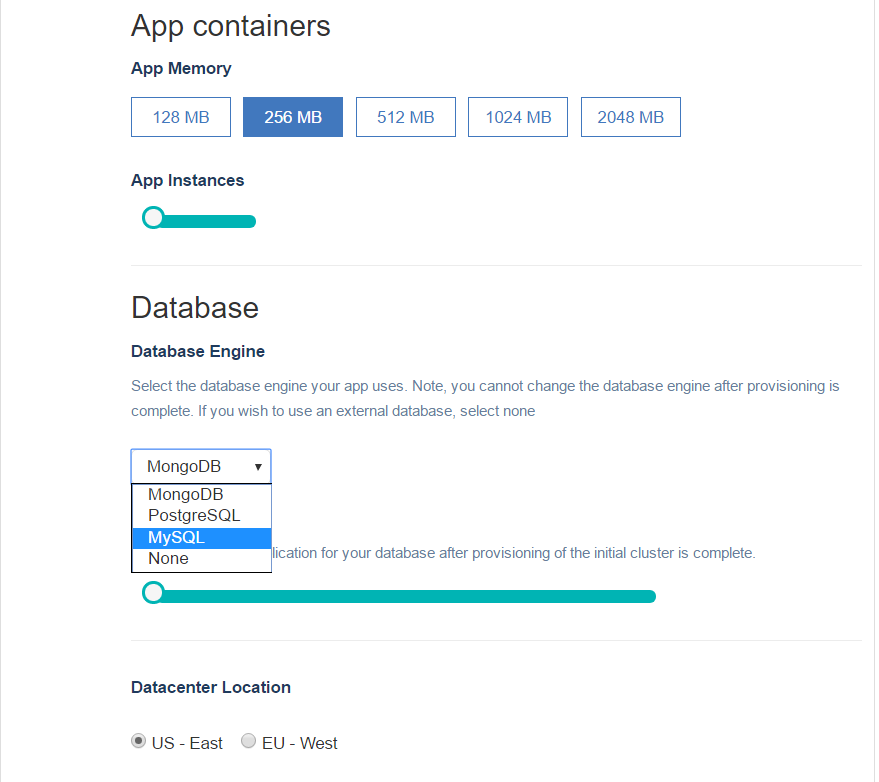
The connection string to the database can be retrieved from the process.env.DATABASE_URI or process.env.DATABASE_URL environment variable. This value is a platform default variable that is automatically set on your behalf. You can however override this value if using an external database. - 3Deploy your cluster
Log in and navigate to the Dashboard. Click on deployments and complete the form. You will be required to select the size of your container and the region where your cluster is to be hosted.
- 4Environment variables
If you will like to launch your app with custom environment variables such as ROOT_URL pointing to your domain, follow the below steps.
- Create a file in the root directory of your app with name env.json. Env.json is completely arbitrary you could name this file with a name more suitable for your use case such as; env_dev.json or env_prod.json
- Edit the file using the JSON syntax below and save the file. ROOT_URL is only for demonstration purposes. If you however do not set this variable the default ROOT_URL is http://[appname-][nodechefid].nodechef.com/
{ "ROOT_URL" : "http://nodechef.com/", "MY_OTHER_VAR" : "MY_VAR_VALUE" }The CLI JSON parser does not accept single quotes. Environment variables can also be configured after deployment from the web dashboard.
-
5Log in from the CLI first to deploy// Type nodechef login and you will prompted for your credentails. nodechef login // You can also generate a deployment token from the dashboard and skip having to login: nodechef deploy -i myapp -auth paste_deployment_token_here
REMAKRS
Once you log in, you will remain logged in on your computer forever until you log out.
You can create a deployment token from the dashboard. Click on App actions → Deployment token. Click the generate token button.
** IMPORTANT ** - For accounts that signed up with a third party log in provider such as GitHub, Bitbucket etc. you will have to use a deployment token to deploy or create a password from the dashboard..
- 6Launching your app
From the command prompt or terminal log in and then deploy your app.
nodechef deploy -i simple-todos -e env.jsonARGUMENTS
-iRequired. Specify the name of your app. Note this name must match the name used when creating the cluster from the dashboard. If there is a mismatch, the CLI will prompt you to create a new cluster. You must disagree to this action in such a case to avoid possible charges.
-eOptional. Deploy your app with environment variables created in step 3.
-cmdOptional. Use this switch to specify another script in your package.json other than the start script to initiate your app.Reference the package.json script segment shown at step 2 under working with NPM scripts. The below command will start your app using "node jobs.js" instead of the start script "node app.js"
nodechef deploy -i simple-todos -cmd worker
--startupwaitOptional. Whenever you deploy your app, a new container is created which replaces the old one. The intent is to allow a seamless upgrade without any of your clients ever hitting an empty page. However for this to be possible, the new container has to completely load and ready to accept incomming connections. This parameter allows you to control how long in seconds the container manager will wait before replacing your old container with the new one. The highest value that can be specified is 60. Note the usage of a double hyphen before startupwait. eg: deploy -i simple-todos --startupwait 10
How to deploy with just the command [nodechef deploy]
In the above steps, we created an environment variable file and we always have to specify the name of the app to be deployed with the [-i] option. You can however create a file with name ncmanifest.json in the root directory of your project folder. You can then enter the name of your app together with your environment variables as seen below:
Whenever the CLI detects the ncmanifest.json file in the root directory of your application, it will automatically attempt to parse the name of your app and other parameters.