Deploy Meteor.js app to the best Heroku alternative
NodeChef is a Cloud PaaS that runs on Bare metal and the best alternative to Heroku if you want the best price to performance ratio. NodeChef also comes bundled with MongoDB and redis databases. Unlike Heroku, there is no need to use third party addons for any of this. You can easily deploy your Metoer.js app together with your MongoDB database with Oplog tailing automatically enabled while saving cost and improving on performance.
NodeChef supports the Meteor.js horse buildpack when deploying from Git providing you the same deployment experience but with better performance and cost savings. When uploading your build ouput instead or using the NodeChef CLI to deploy, your app is built using your local installed Meteor.js version and the build output deployed to your container running on NodeChef.
NodeChef also comes with built-in Kadira Meteor.js APM for which you can enable for your applications for much deeper insights into application performance.
Visit the Meteor.js hosting page to review all the features provided by NodeChef
This article will provide a general guide on how to deploy your Meteor.js app by using the NodeChef CLI, connecting and using your repository from GitHub, Bitbucket or GitLab or upload the tar.gz output of the meteor build command from the dashboard.
-
1Setup a NodeChef application
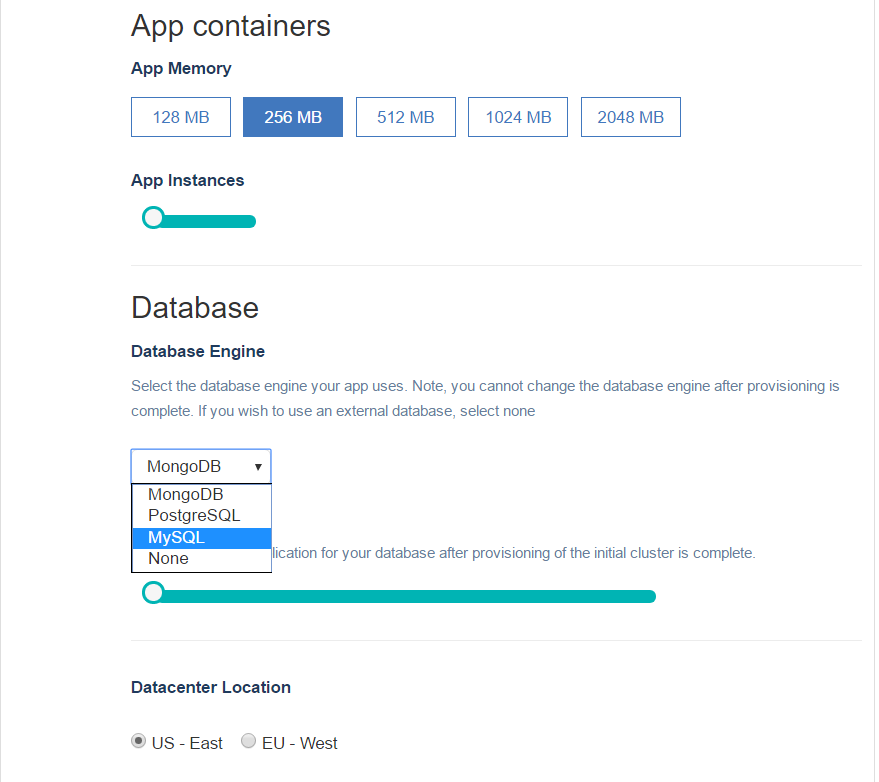
Log in and navigate to the Dashboard. Click on deployments and complete the form. You will be required to select the size of your container and the region where your cluster is to be hosted. You can also choose to create your meteor app with a MySQL, MongoDB or PostgreSQL database.
Once the cluster is provisioned, a URL will be assigned to your project which will be displaced on the dashboard.
- 3Deploying your Metoer.js app.
You can deploy your meteor app to NodeChef cloud hosting by uploading the output of meteor build, using GIT or the NodeChef CLI.
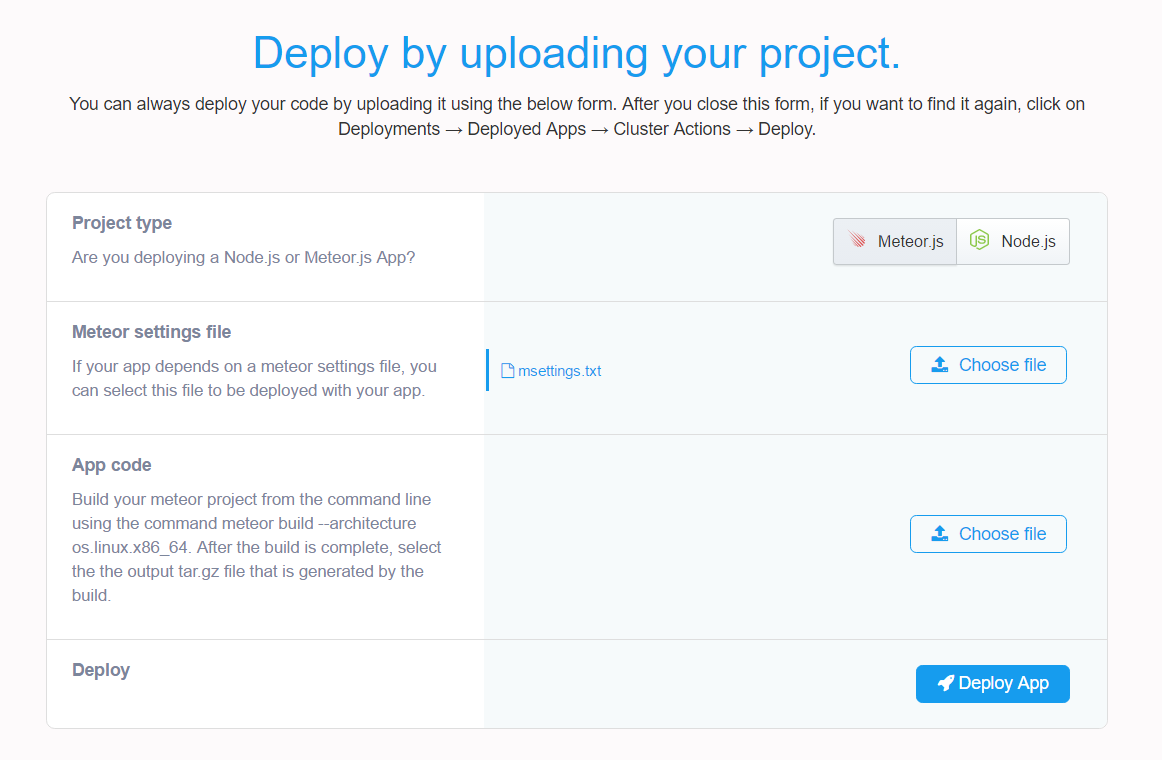
Deploy your app by uploading the build output using the dashboard.To use this deployment method, you must first run the build command locally as seen below.
meteor build <folder_name> --architecture os.linux.x86_64Remarks
From the command prompt (windows) or terminal (linux, mac) build your app using meteor build for os.linux.x86_64.
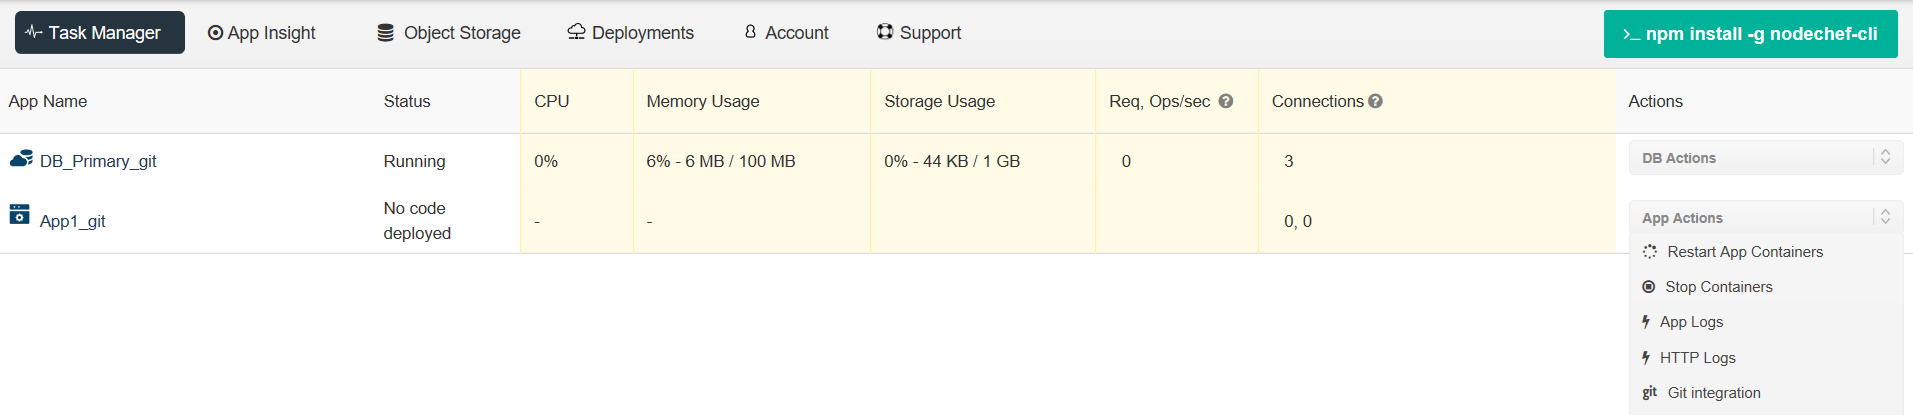
If you intend to use the --server flag which requires the <host>:<port> value, you can retrieve this value from the dashboard after you deploy your cluster in Step 1 by clicking on Deployments → Deployed Apps → Cluster Actions → Deploy app. If the assigned endpoint to your app is "https://simple-todos-1.nodechef.com", the host address of your app is then "simple-todos-1.nodechef.com" and the port is 80.After building your project from Step 2. You will will be able to upload the output of your project build to your App containers. You can always find the form to upload your project from the dashboard by navigating to the task manager → App actions → Upload code.
From the upload form, under App code, select the output tar.gz file that was generated from the build.
In case you wish to deploy your app with meteor settings. You can select your meteor settings file from the upload form. If using a remote database (That is, a database not hosted by NodeChef), you must set the MONGO_URL and the MONGO_OPLOG_URL (optional) in your meteor settings file.
If you have settings.json file, you can simply select to include it as part of the deployment as well.
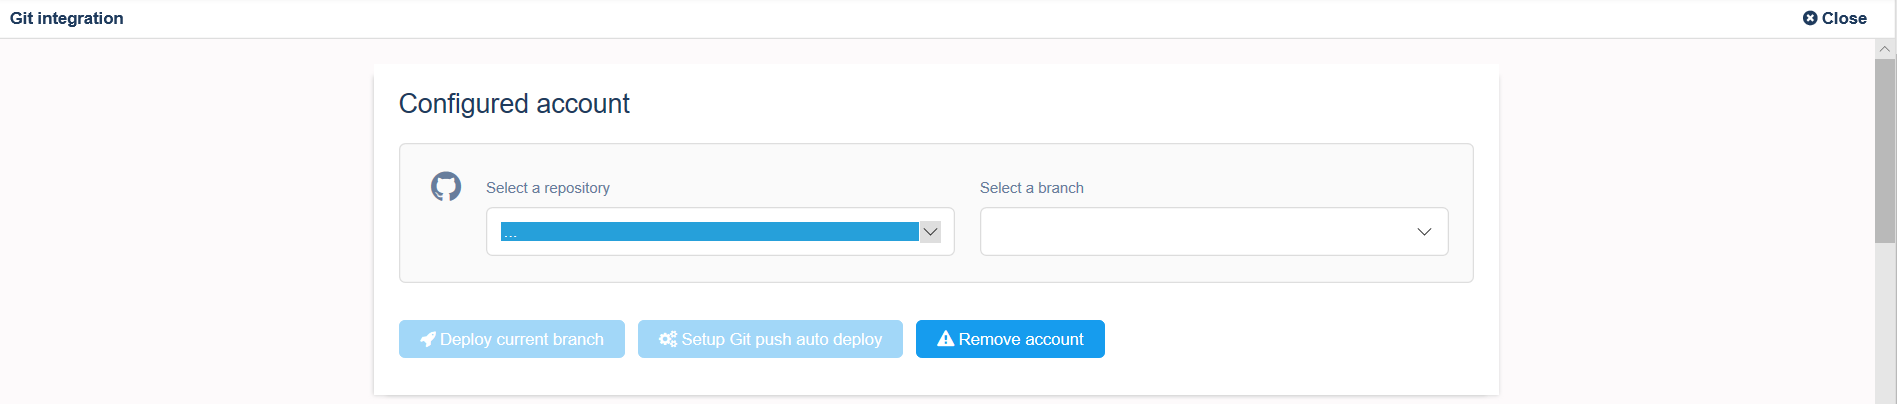
Deploying your Meteor.js app from your GitHub, GitLab or BitBucket repository.Firstly, if you did not sign up for a NodeChef account using a GIT repo provider, you must authorize NodeChef to access your GitLab, GitHub or BitBucket account. You only have to do this once per NodeChef account. Click “Connect to (repository)”, a shown below to start the authentication.
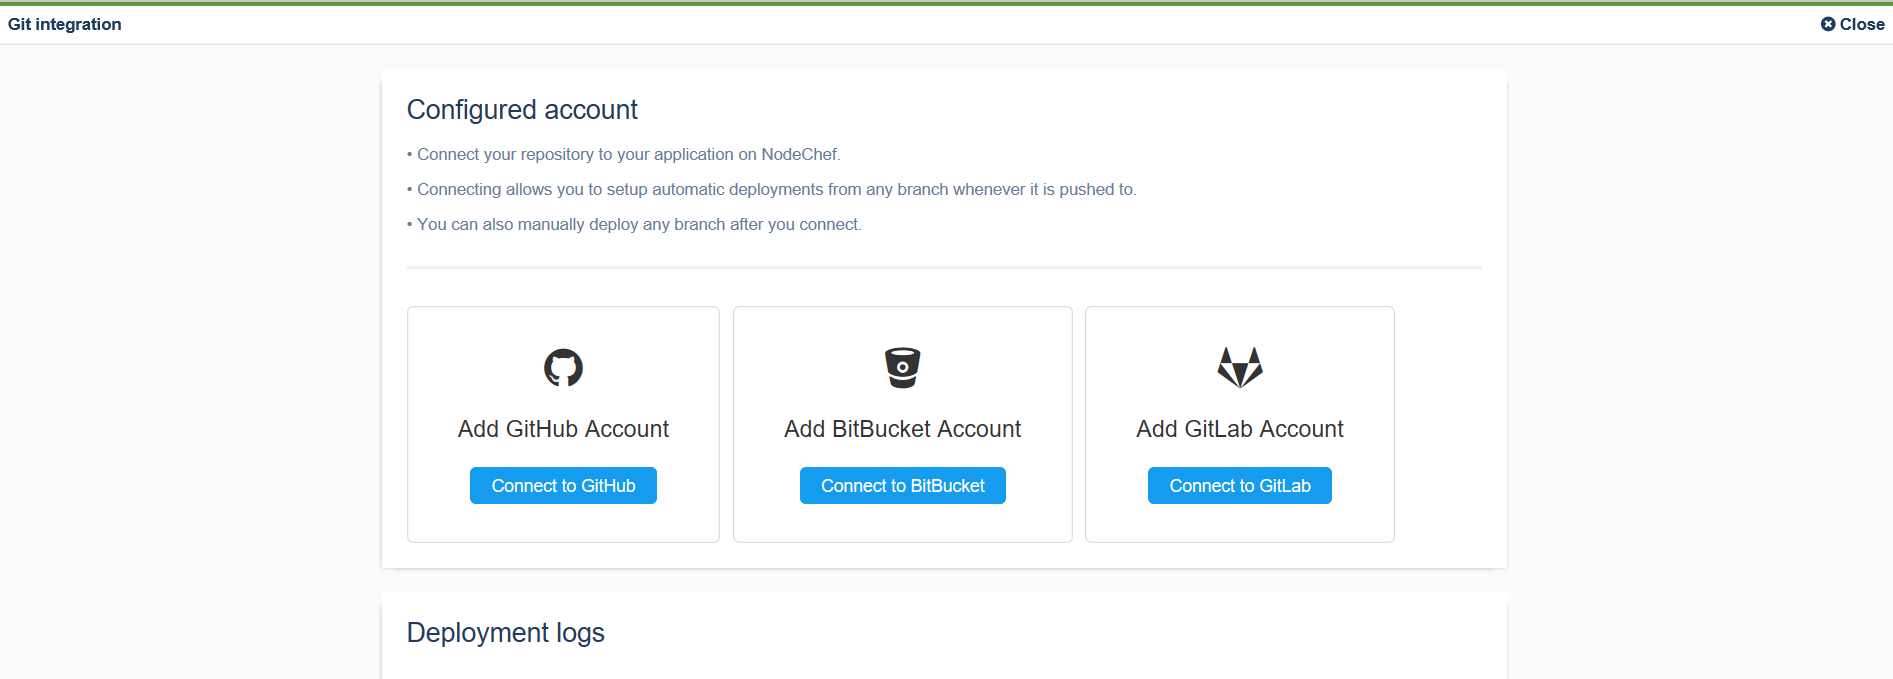
After you link your Account to a Git repo, you can selectively deploy from branches as well.
Deploying your Meteor.js app using the NodeChef CLI.Install the NodeChef CLI from npm as showm below:
npm install -g nodechef-cliCD into your project folder and use the below command as seen below. You will have to login from the command line to deploy or use a deployment token if you generated one from the dashboard.
// Log in using email and password instead of a deployment token. nc login prompts for your credentials nc login nc deploy -i my_first_meteor_app -meteorsettings settings.jsonUse the optional -meteorsettings switch to specify the absolute or relative path to your settings.json file.