Deploy your app from GitLab, GitHub or BitBucket repository.
You can configure GitLab, GitHub or BitBucket integration from the NodeChef Dashboard. This integration makes it easy to deploy code living on GitHub, BitBucket or GitLab to your app containers running on NodeChef.
Before your deploy, please read the notes written for the language your app is written in below.
- Java apps
- Ruby, Rails apps
- Python apps
- Go apps
- .Net Core apps
Deploying Java, JVM applications from source
When the NodeChef runtime detects either one of these file types ("pom.xml", "pom.atom", "pom.clj", "pom.groovy", "pom.rb", "pom.scala", "pom.yaml", "pom.yml") in your project directory, it uses the open source Heroku Java buildpack to build your application. More details on this buildpack can be found here: https://github.com/heroku/heroku-buildpack-java
When the NodeChef runtime detects either one of these file types (gradlew, build.gradle, settings.gradle) in your project directory it uses the open source Heroku gradule buildpack. More details on this buildpack can be found here: https://github.com/heroku/heroku-buildpack-gradle
When the NodeChef runtime detects a project/build.properties file in your project directory and either a file ending with .sbt or .scala, it uses the open source Heroku scala buildpack. More details on this buildpack can be found here: https://github.com/heroku/heroku-buildpack-scala
Deploying JVM build artifact
You can build your application locally and simply deploy the .jar, .war, .zip file to NodeChef. In this case, NodeChef uses the CloudFoundry buildpack to create the application executable. More details on the CloudFoundry Java, JVM buildpack can be found here: http://docs.cloudfoundry.org/buildpacks/java/index.html
Example deploying Grails
Example deploying Groovy
The Java Buildpack can run Groovy applications written with the Ratpack framework and from raw .groovy files (no pre-compilation).
Example deploying Java Main
The Java Buildpack can run Java applications with a main() method provided that they are packaged as self-executable JARs
Example deploying Play framework
Example deploying Servlet packaged as a WAR file
Example deploying Spring Boot CLI
Notes on Ruby, Rails projects
NodeChef automatically detects your project as Ruby, Rails when the Gemfile and Gemfile.lock is found in the root directory of the project.
Click here to see supported ruby, bundler, jruby versions
Your first build runs slower than subsequent builds as NodeChef caches dependencies between builds.
MRI.
For MRI, specify the version of Ruby in your Gemfile as follows:
JRuby
For JRuby, specify the version of Ruby in your Gemfile based on the version of JRuby your app uses.
-
For 1.9 mode, use the following:
ruby '1.9.3', :engine => 'jruby', :engine_version => '1.7.25' -
For 2.0 mode, use the following:
ruby '2.0.0', :engine => 'jruby', :engine_version => '1.7.25' -
For JRuby version >= 9.0, mode, use the following:
ruby '2.2.3', :engine => 'jruby', :engine_version => '9.0.5.0'
If you try to use a binary that is not supported, staging your app fails with the following error message:
The Ruby buildpack does not support the pessimistic version operator ~> on the Gemfile ruby directive for JRuby.
Notes on Python projects.
NodeChef automatically detects your project as Python if you do not explicitly specify if one of the below conditions is met.
- Your project has a requirements.txt file in the root of the project folder.
- Or your project has a setup.py file in the root of the project folder.
Specify a Python version
You can specify the version of python to use by including it in the runtime.txt file in the root folder of your project. See example below:
Click here to see supported python versions
NodeChef always uses the latest version of the Python buildpack.
To request the latest Python version in a patch line, replace the patch version with x: 3.6.x To request the latest version in a minor line, replace the minor version: 3.x
Start command.
For python projects, specifying a start command is required. You can specify a start command in the root folder of your project by creating a file with name: Procfile.
An example python project with a Procfile See image below:

Example Procfile starting your app with a simple python script:
Example Procfile starting your app with gunicorn:
Another example starting a Django app:
Example Procfile starting running your web app on Waitress:
Listening for connections
NodeChef automatically sets the environment varabile PORT at runtime. You must listen for connections using the value of this variable. See below example:
Notes on Golang projects.
NodeChef automatically detects your project as Golang if you do not explicitly specify if one of the below conditions is met.
- Your project has been packaged with godep using godep save.
- Your project has a vendor/ directory and has any files ending with .go.
- You have set the GOPACKAGENAME environment variable and your project has any files ending with .go. Note, if you are not using any vendering tool, you must set the environment variable GOPACKAGENAME for the deployment to work.
- Your project has a glide.yml file in the root folder.
- Your project has a Gopkg.toml file in the root folder.
- Your project has a go.mod file in the root folder and you are using the go mod init vendering tool.
Click here to see supported go versions
Start command.
Because Golang apps compile to a single file native binary, by default your project will be started with the build output as the command. You can override this behaviour by using a Procfile created in the root directory of your project. See example Procfile:
When Your Main Package is Not in the Project Root
A common project pattern is to place main packages in a subdirectory called cmd like in the example below:
In this case, you must set the environment variable GO_INSTALL_PACKAGE_SPEC. For example, if the module name for the project is github.com/superd/app-package-name, the value of the environment variable will be github.com/superd/app-package-name/cmd/server.
Notes on .NET Core projects deployment
NodeChef automatically detects your project as .NET Core when the *.csproj or *.fsproj is found in the root directory of the project. Also you can deploy the output directory of the dotnet publish command
For Asp.NET Core apps, there is no need to hardcode the URL in the app, NodeChef automatically starts your app with the option --server.urls http://0.0.0.0:$PORT. The value of port is dynamic at runtime and NodeChef supplies this value. We also set the environment variable ASPNETCORE_URLS which is the same value that is passed to the --server.urls parameter.
Your first build runs slower than subsequent builds as NodeChef caches dependencies between builds.
Below is an example main method
Click here to see supported runtime versions
Add Custom Libraries
If your app requires external shared libraries that are not provided by the rootfs or the buildpack, you must place the libraries in an ld_library_path directory at the project root.
Deploy Apps with Multiple Projects
If your solution contains multiple projects, you must specify which of your projects is the main one. You can do so by creating a .deployment file in the root directory. You can then use the below example to specify the path to the .csproj or .fsproj of the main project.
-
1Create your app
Provision your app and/or database containers from the Deployments tab in the NodeChef Dashboard. On the Deployments tab, enter your application name, choose your app container size, database engine and size (you can also select none to use an external database), datacenter location and then click “Launch Cluster”.

-
2Authorize NodeChef to access your GitLab, GitHub or BitBucket account
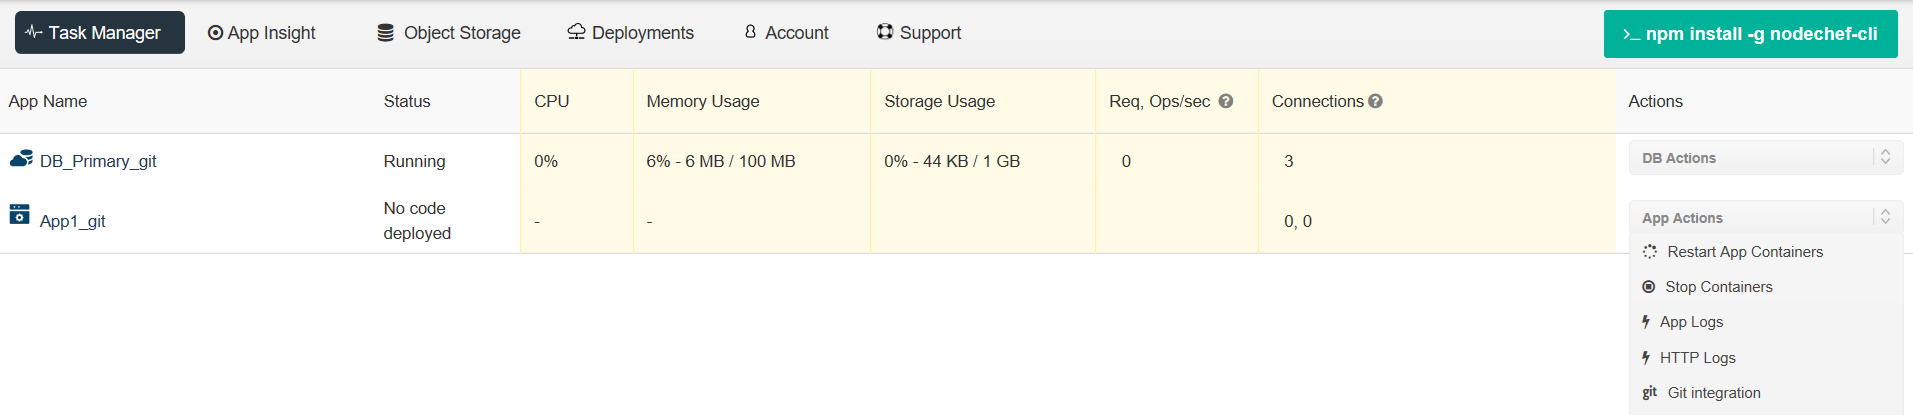
After your cluster is launched, move to the Task Manager → App Actions → Git integration to configure GitLab, GitHub or BitBucket integration.
To configure GitLab integration, you have to authenticate with your Git repository. You only have to do this once per NodeChef account. Click “Connect to (repository)”, to start the authentication.
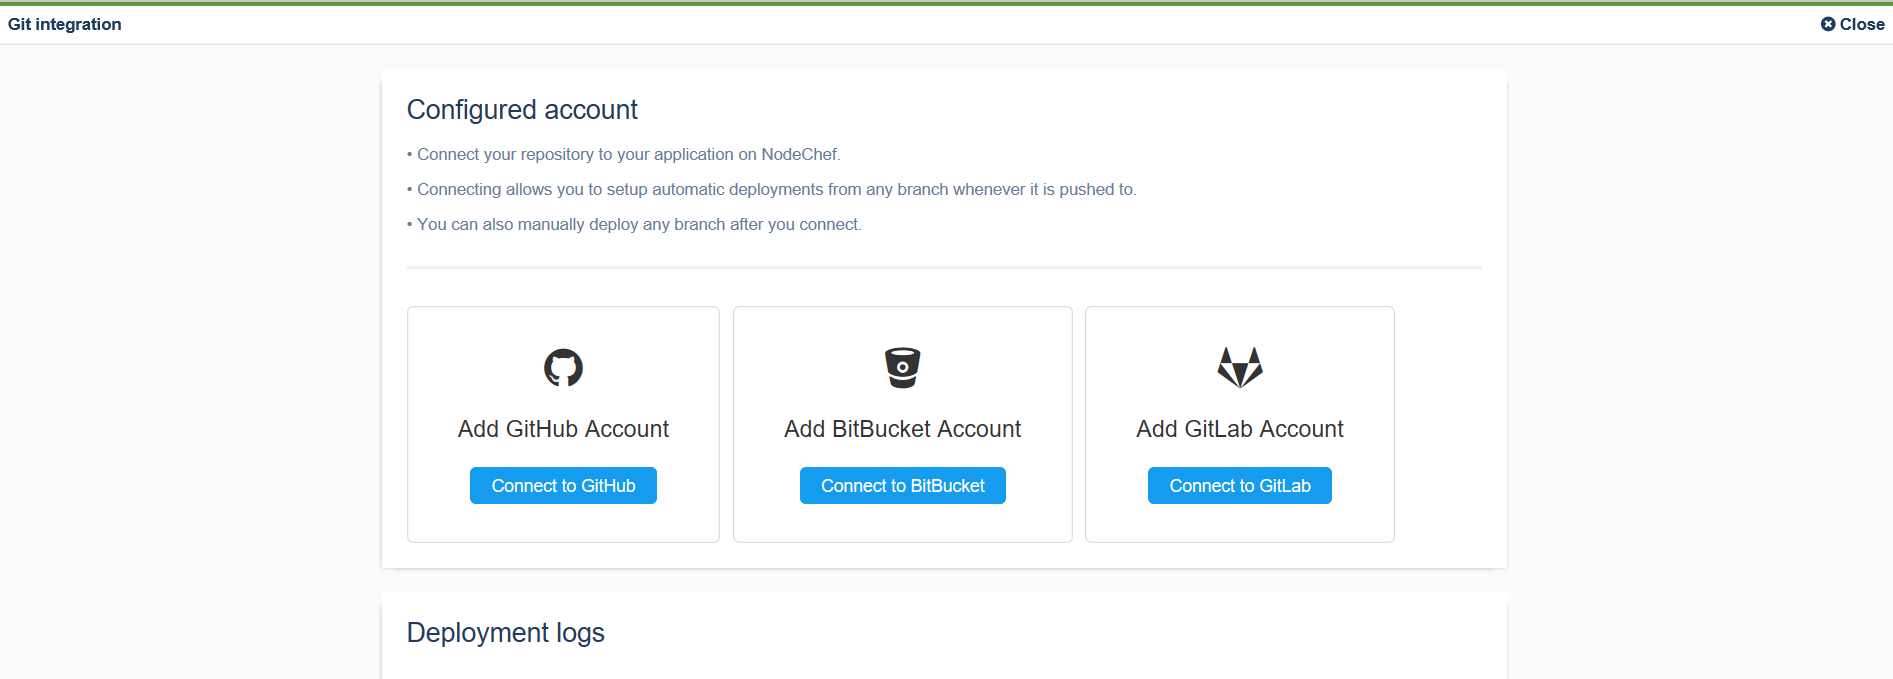 If you signed up or logged in with GitHub, GitLab or BitBucket, the authorization step should be already complete without having to perform another authorization step.
 -
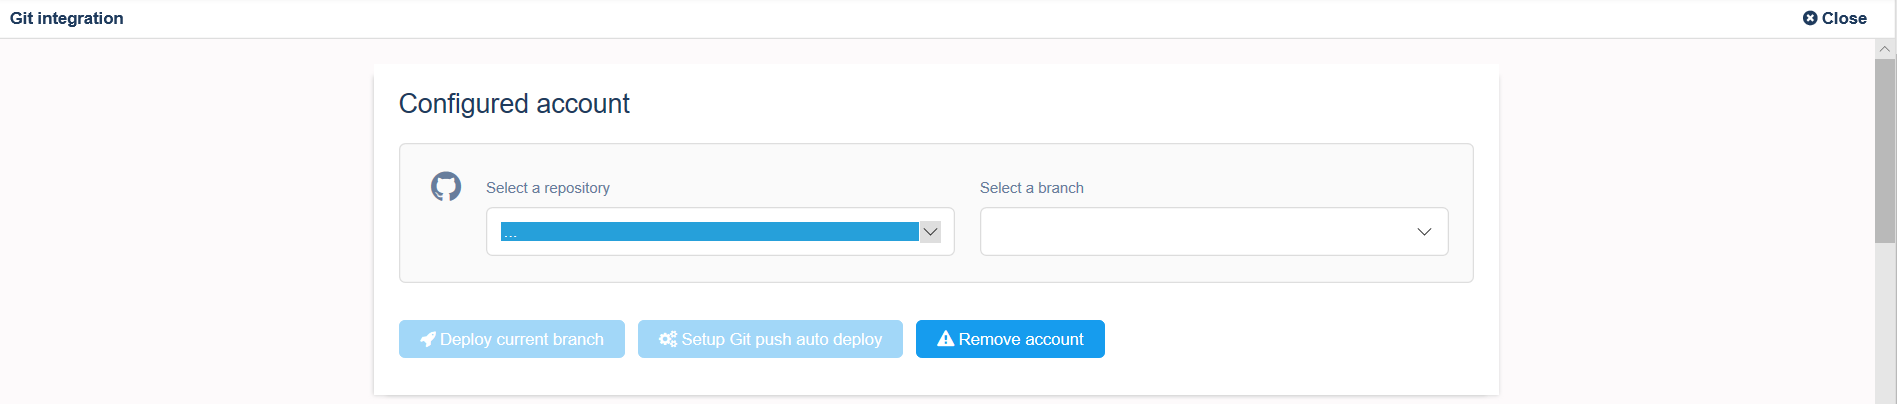
3Deploy your app
After you link your Account to a Git repo, you can selectively deploy from branches.