Configure Parse Server live query
Parse.Query is one of the key concepts for Parse. It allows you to retrieve Parse.Objects by specifying some conditions, making it easy to build apps such as a dashboard, a todo list or even some strategy games. However, Parse.Query is based on a pull model, which is not suitable for apps that need real-time support.
Suppose you are building an app that allows multiple users to edit the same file at the same time. Parse.Query would not be an ideal tool since you can not know when to query from the server to get the updates.
To solve this problem, we introduce Parse LiveQuery. This tool allows you to subscribe to a Parse.Query you are interested in. Once subscribed, the server will notify clients whenever a Parse.Object that matches the Parse.Query is created or updated, in real-time.
Parse LiveQuery contains two parts, the LiveQuery server and the LiveQuery clients. In order to use live queries, you need to set up both of them.
Configuring LiveQuery for your parse server.
Navigate to the Task manager. Click on App actions → LiveQuery settings. Complete the live query form and use the save changes button to active live query for your Parse Server.
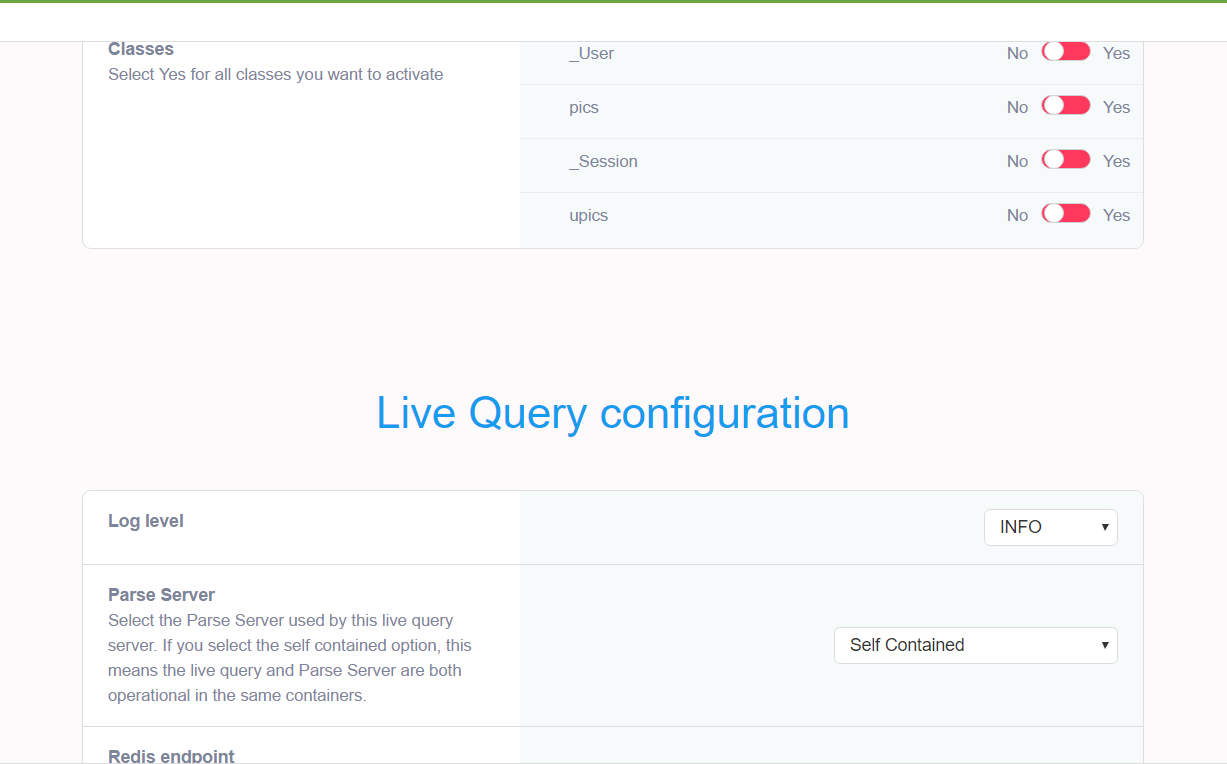
Classes
Under the classes section, you can enable all classes which will be supported by the LiveQuery server. You can enable and disable classes at anytime. Note, this operation always restarts the server.
Log Level
Specify the log level used by the LiveQuery Server. Only use VERBOSE for debugging purposes.
How to configure a production grade LiveQuery server.
1. For scalability and performance, we recommend your Parse Server API runs in a different set of containers than the LiveQuery Server. This allows for the best performance and also allows you to scale each component independently.
2. For example, if your App backend is named "temptations", you can provision another Parse Server without a database and name this new Parse Server "temptations-livequery". When asked for a connection string when provisioning "temptations-livequery", you should use the connection string for "temptations" found under DB Actions → Connect on the task manager. After this, provision a redis instance with name "temptations-redis".
3. After "temptations-livequery" and the redis instance have been provisioned you can configure the LiveQuery server for "temptations-livequery" from App actions → LiveQuery settings. Under the Parse Server field, select the "temptations" parse server. Under Redis endpoint, select the "temptations-redis" instance. Note, the LiveQuery settings is configured for "temptations-livequery" and not our main Parse Server "temptations".
4. Your LiveQuery clients should be then configured to use the endpoint of the "temptations-livequery" server.