In this article, we mention AWS but the content applies to all cloud providers (Azure, GCP, Azure, DigitalOCean etc) as well. Node.js is also used as proxy for all other programming frameworks/languages.
Scaling an application involves running several instances of your application across multiple machines to take advantage of more compute resources to meet the incomming traffic demand when your current resources is not able to meet the demand. Typically, you will notice this as your app becomes less responsive and other requests timing out because your current capacity is not enough to allow your application to respond timely to incomming requests. Of course, this can be very complex as there are multiple layers to every application. Sometimes, you do not need more instances of your app and it so happens you missed an index on your database and that happens to be the bottleneck.
In this article, we assume you have checked your database (NodeChef provides a slow query analyzer for MongoDB, MySQL and PostgreSQL which makes it easy to see any missed indexes.) and all queries are properly indexed.
Applications such as Node.js by default need to run multiple instances even if it is on the same server as it is a single threaded application at the user code execution layer. As such, any complex JSON parsing and data manupilation or other non IO computations happen on a single thread. This can easily become a bottleneck as the number of concurrent requests increases. NodeChef makes it easy to run multiple instances of your application all bundled in separate containers. In the next section, we will discuss running multiple instances on the same server as well as running multiple instances across multiple servers.
Running multiple instances of your application on a single server
Let's assume, you are using a 2 vcpu and 4 GB ram server and you notice your application code only uses about 1 GB RAM. You want to run another instance of your application to take advantage of the extra resources available on the server.
On the NodeChef dashboard, navigate to deployments → deployed apps. Under the app containers section, select the number of instances you want to run and then click on Cluster Actions → Reconfigure.

Running multiple instances of your application across multiple servers
In the above example, if you had multiple servers, NodeChef will automatically distribute new containers on your fleet of servers in a least number of containers per server fashion. This ensures if container 1 is running on server 1, the next container will be running on server 2 and then it loops back to server 1 as you add more containers.
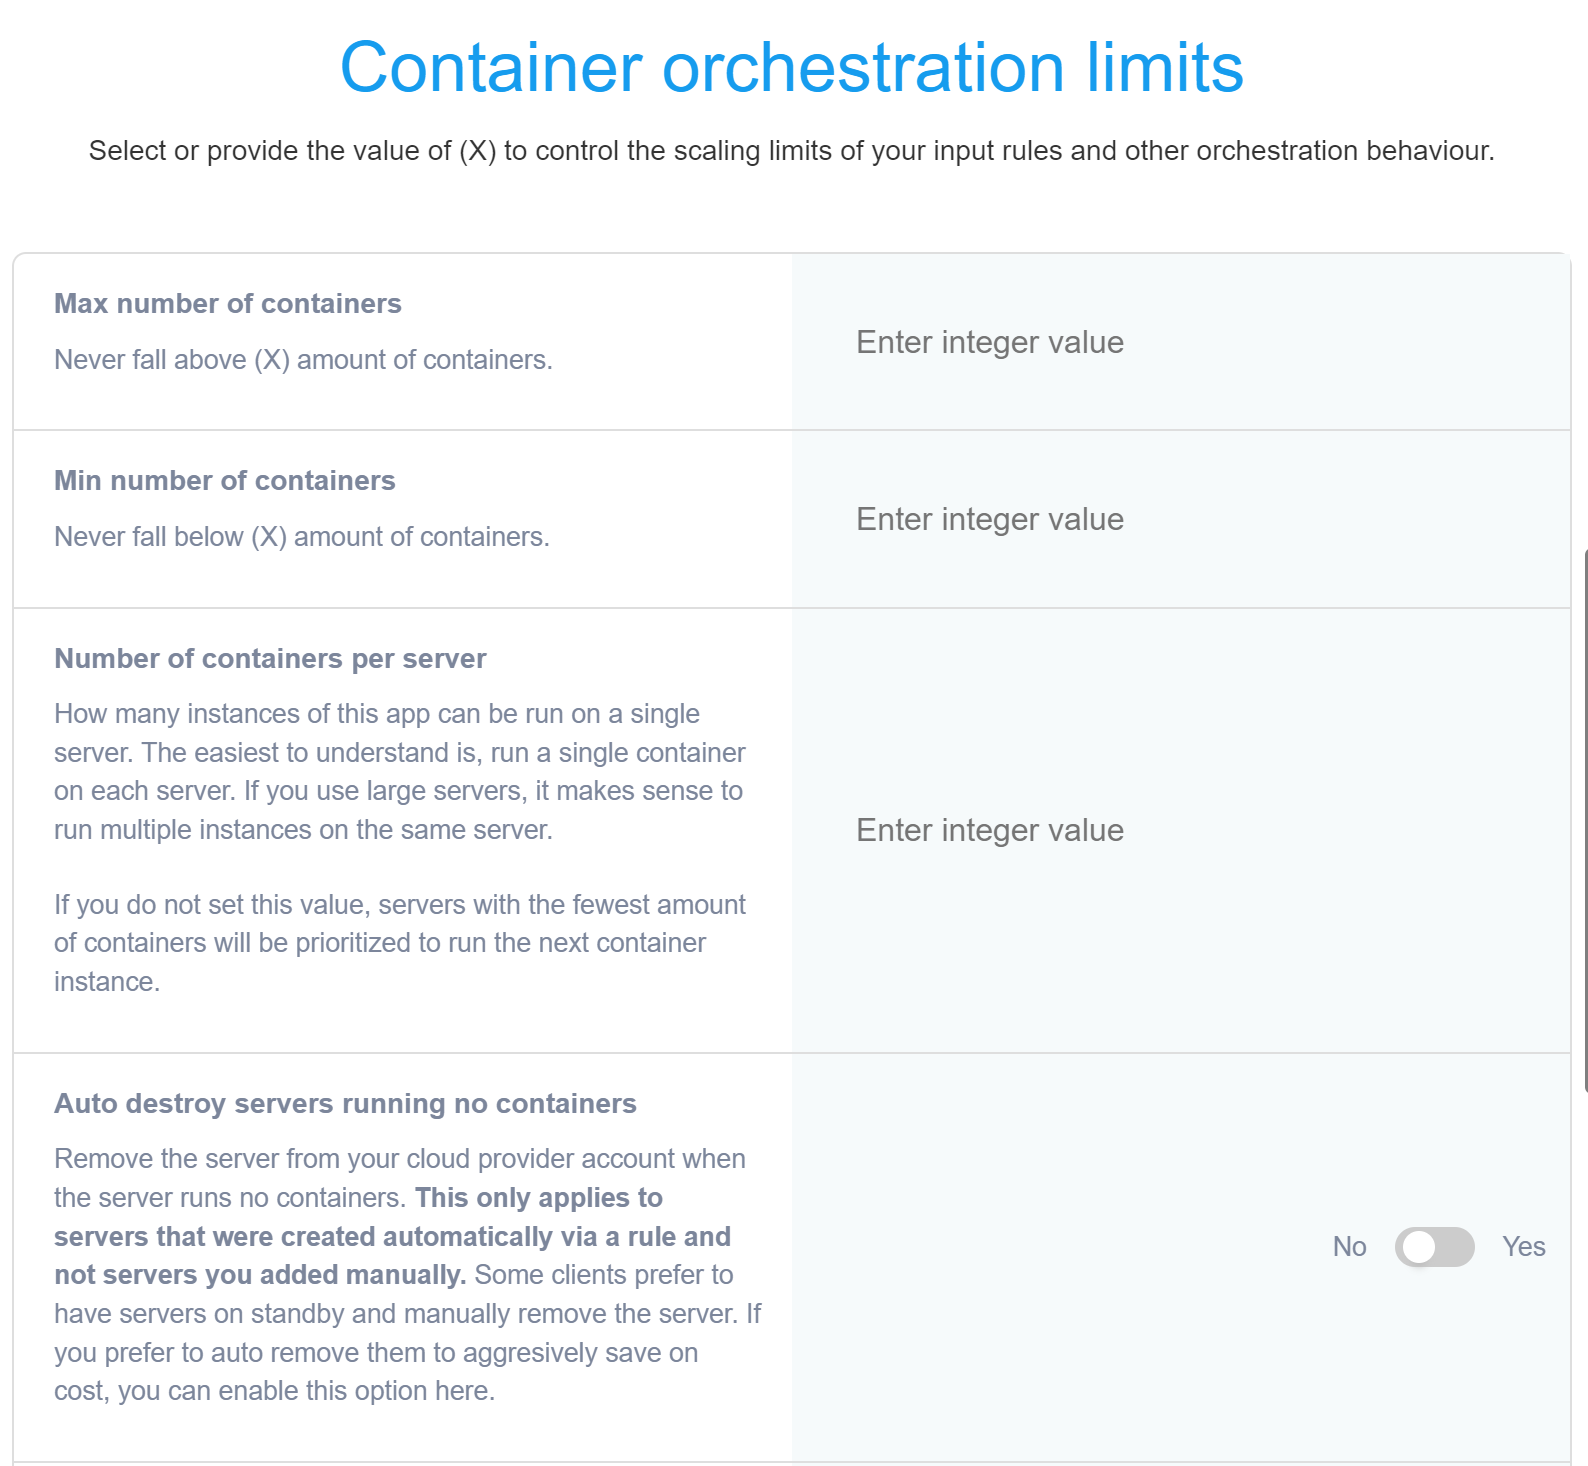
You can however control how many containers a single server can host. For example, your app uses about 3 GB RAM and you are using 4 GB RAM servers to host your app containers. In this case, you will want NodeChef to only run a single instance of your app on each server. It is important to do this since if any of your team members say accidentally try to scale and there are no new servers, you could end up having two instances on a single server both which cannot run as there is not enough memory.
To accomplish this, still under the deployed apps section, click on Cluster Actions → Container rules. Scroll to the Container orchestration limits. Under the Number of containers per server section. You will set a value of 1 in this case as you want to run only a single instance per server.
To run multiple instances of your app across multiple servers, there are two architectures you can employ.
Architecture 1. You use your servers to run both the load balancers and the app containers. With this architecture, you typically have beefy servers like 16 GB Ram and above and about 3 of those servers. This way you have 3 load balancers and your app containers distributed across the 3 servers. NodeChef will configure the load balancers in such a way they can each route traffic to the other servers. This architecture will not scale as massively as architecture two as you typically have only one IP address per server. If you really want a truly elastic setup, we advice you opt for architecture two described below.
Architecture 2. You run two servers dedicated to load balancing and then you run multiple servers dedicated to app containers. This architecture separates the app containers from the load balancers. Note, you can designate a server for load balancing or for hosting app containers when adding the server. The option to select the role of the server been added was described in Deploying and managing Node.js apps on AWS and other cloud providers.
For a start, if going with Architecture 2, we advice you add two servers dedicated to load balancing. You can use 4 GB Ram servers minimum for your load balancers. You can always add additional load balancers as well when your traffic crosses the 50,000 concurrent requests limit.
The NodeChef bare metal public cloud uses architecture 2, to host our clients applications.
Note, if you are going with architecture two and you initially setup your server to run everything on the same server, to switch to architecture two, you will need to add new servers to meet this requirement and create a new app. Set the number of containers per server limit as described above. See below steps:
First add two servers, and select the role load balancer. You can use 4 GB RAM servers for your load balancers.
Add any amount of servers and select the role app containers. The easiest to understand is to run 1 container per server, you can also run any amount of containers per server as described above. Create a new app which will take advantage of this architecture and set the number of containers per server limit.
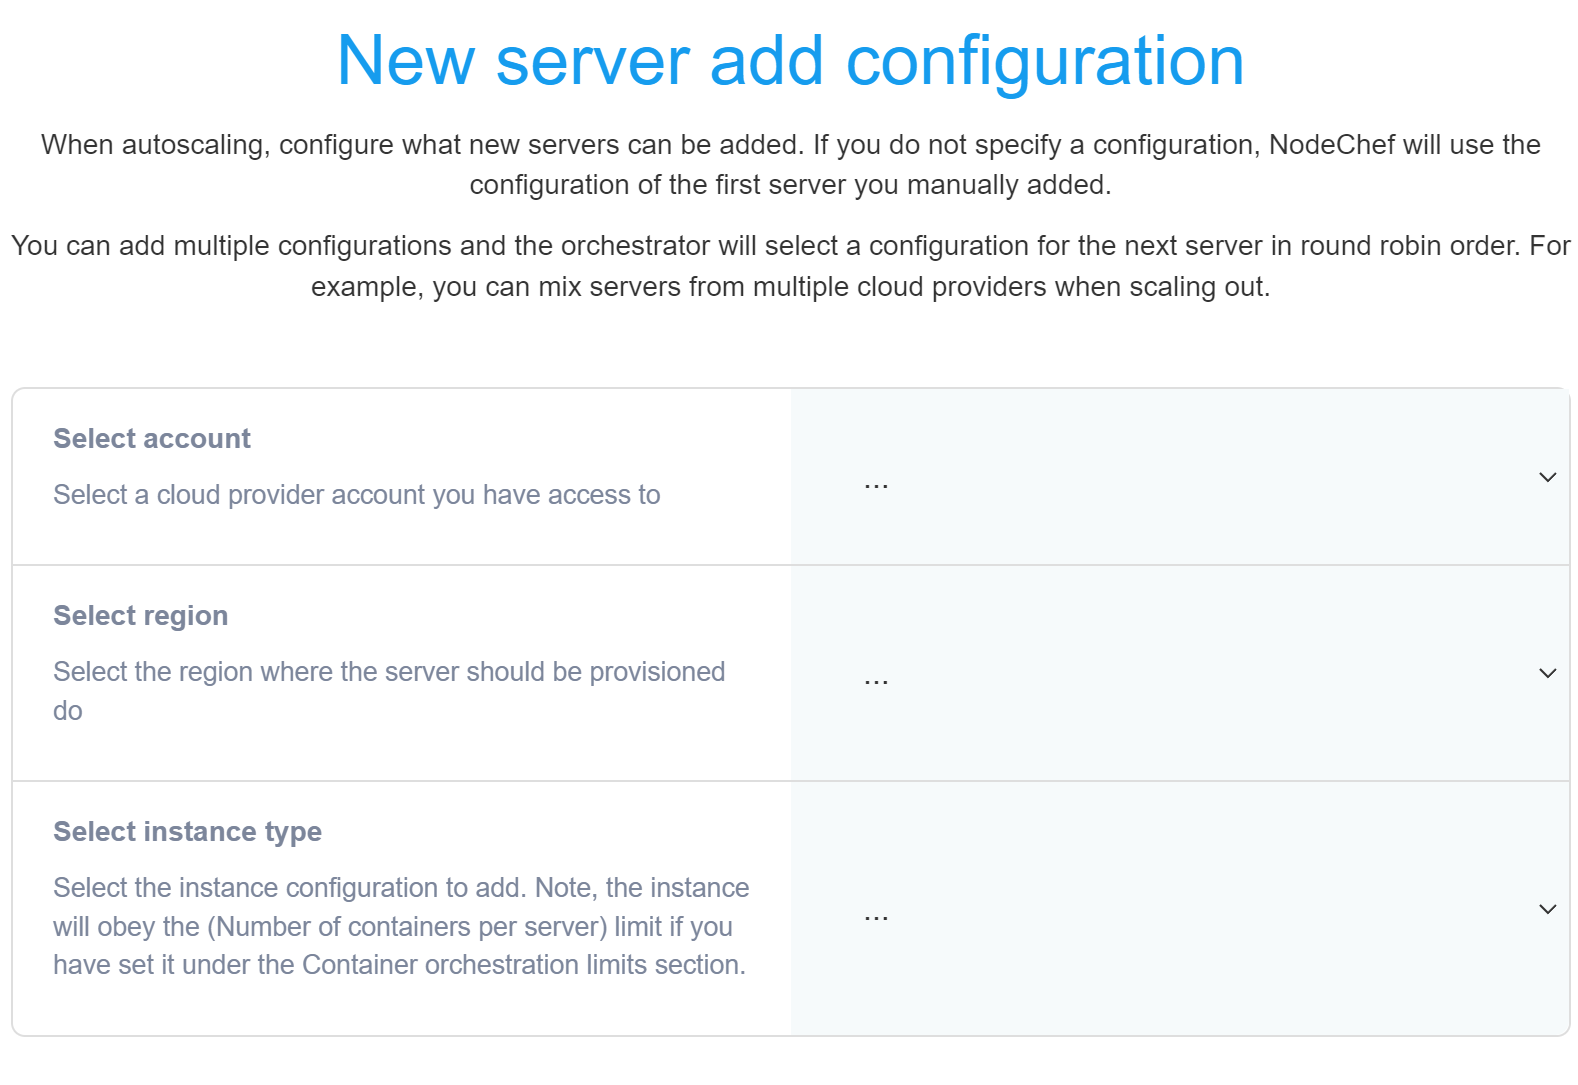
So now, you have a setup which can load balance traffic across multiple servers and you have set the number of containers per server limit. So what happens when you increase the amount of containers and there are no more servers. By default the request will fail, however, you can configure NodeChef to automatically provision a server behind the scenes so you do not have to manually add servers before changing the number of containers. You can accomplish this under the Container rules section. Scroll down to the New server add configuration. Under this section, you can tell NodeChef the account, provider, the region and the instance type to use when scaling out your app. Note, if you have not integrated with a Cloud provider, you will have to first add your servers manually and then change the number of conainers.
We hope this part provided you with good information on the basics of scaling on NodeChef. In the next section, we will deal with automatically scaling by setting predefined rules.