NodeChef DBaaS for MongoDB can provision MongoDB replica sets, secure connections with an SSL certificate which is also auto renewed, provides tools to fork databases and collections on demand, perform continuous backups folded into 30 minute segments and allow you to restore the database up to a point in time all from a simple to use and intuitive dashboard. Our offering is enterprise grade and includes the ability to live migrate your MongoDB from your current setup to your new setup on NodeChef. You own the servers on which the MongoDB run and have the full flexiblity to use any instance type from any cloud provider. From NodeChef's stand point, we simply need the public IP address and SSH access to you instance.

This article will walk you through, adding your servers from the NodeChef dashboard and then proceeding to provision your first replica set. You can provision as many replica sets as required on your servers as NodeChef manages the multi tenancy of the MongoDB process on your servers. For example, if you are an agency hosting multiple client databases, you do not have to buy separate servers for each of your clients unless you absolutely need to. NodeChef can easily provision multiple replica sets and provide unique connection strings for each replica set.
When adding servers to NodeChef, you have the option to choose the region and even the availability zone in the case of AWS and other cloud providers that support availability zones. We recommend you add servers from min two separate regions if creating a replica set instead of a standalone instance. These two regions must be close to each other distance wise. For example, AWS supports two separate US-East regions such as US East (Ohio) and US East (N. Virginia). In the case of a provider like DigitalOcean, you have the option to choose between New york 1, 2 and 3. If using AWS, you can also use a single region and then host your three servers in different availability zones.
Add your servers to NodeChef using the public IP address of the Ubuntu host machine
To add your servers using the public IP address and the log in details. Navigate to Private cloud from the dashboard. Under the add new server section, enter the details on your server and select to use this server to host only a database. Before you add the server please ensure the server passes the below checklist
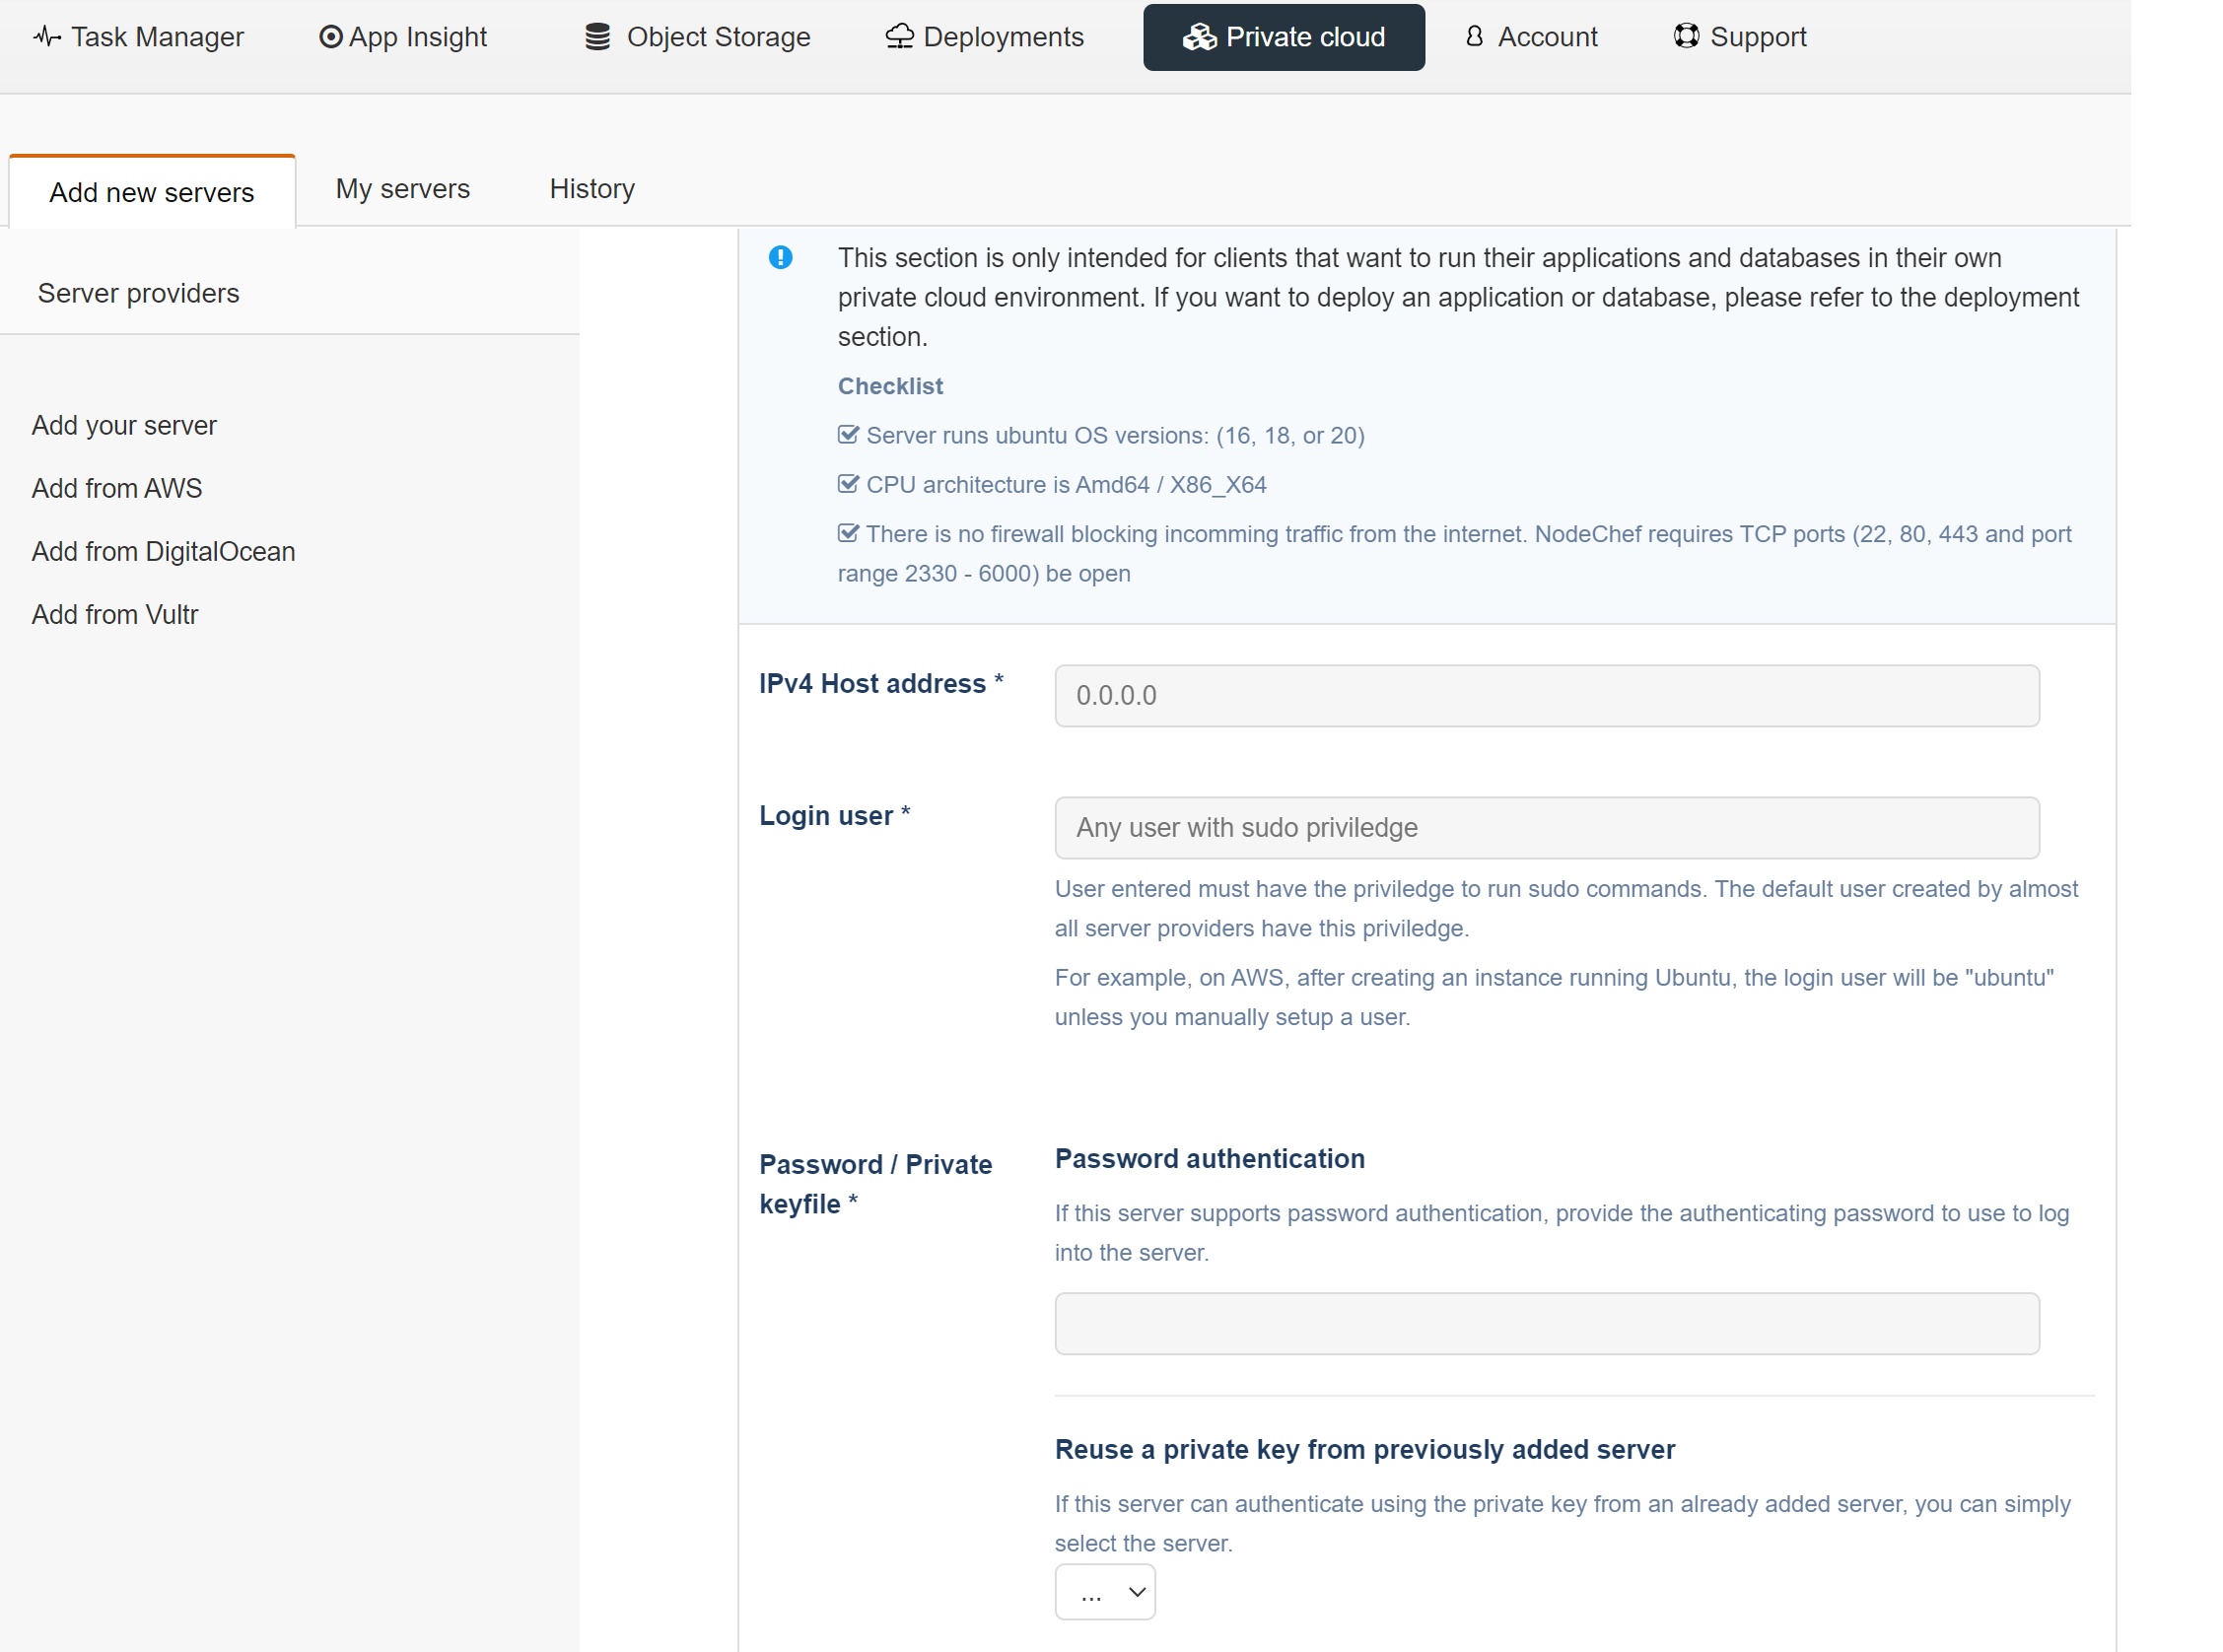
- Server runs Ubuntu OS versiosn 18 or 20. We prefer version 20 if available.
- CPU architecture of the servers is X86_X64
- If your server is behind a firewall, you must open ports 22, 80, 443 and port range 2330 - 6000
Complete the add your server form and then click the Add server button to add the server. It takes roughly about 10 minutes for NodeChef to setup your and you can view the progress under the history section as seen below.

Add your servers to NodeChef by integrating with AWS, Vultr, DigitalOCean.
As of this writing, we currently provide integrations with AWS, Vultr and DigitalOCean. You can provision a server on your cloud account directly from the NodeChef dashboard.
Navigate to the Private cloud section and select your cloud provider. Enter your credentials, select the region where you want to provision the server and then proceed to provision. For high availability, we recommend when provisioning your servers using AWS, you explicitly select 3 different availablity zones for each provision. If you are using DigitalOCean for example and prefer US East, you can select New York 1 for the first server, New York 2 for the second server and so on. If the server provider does not have 3 different data centers in a particular region, you can easily mix servers from different providers.
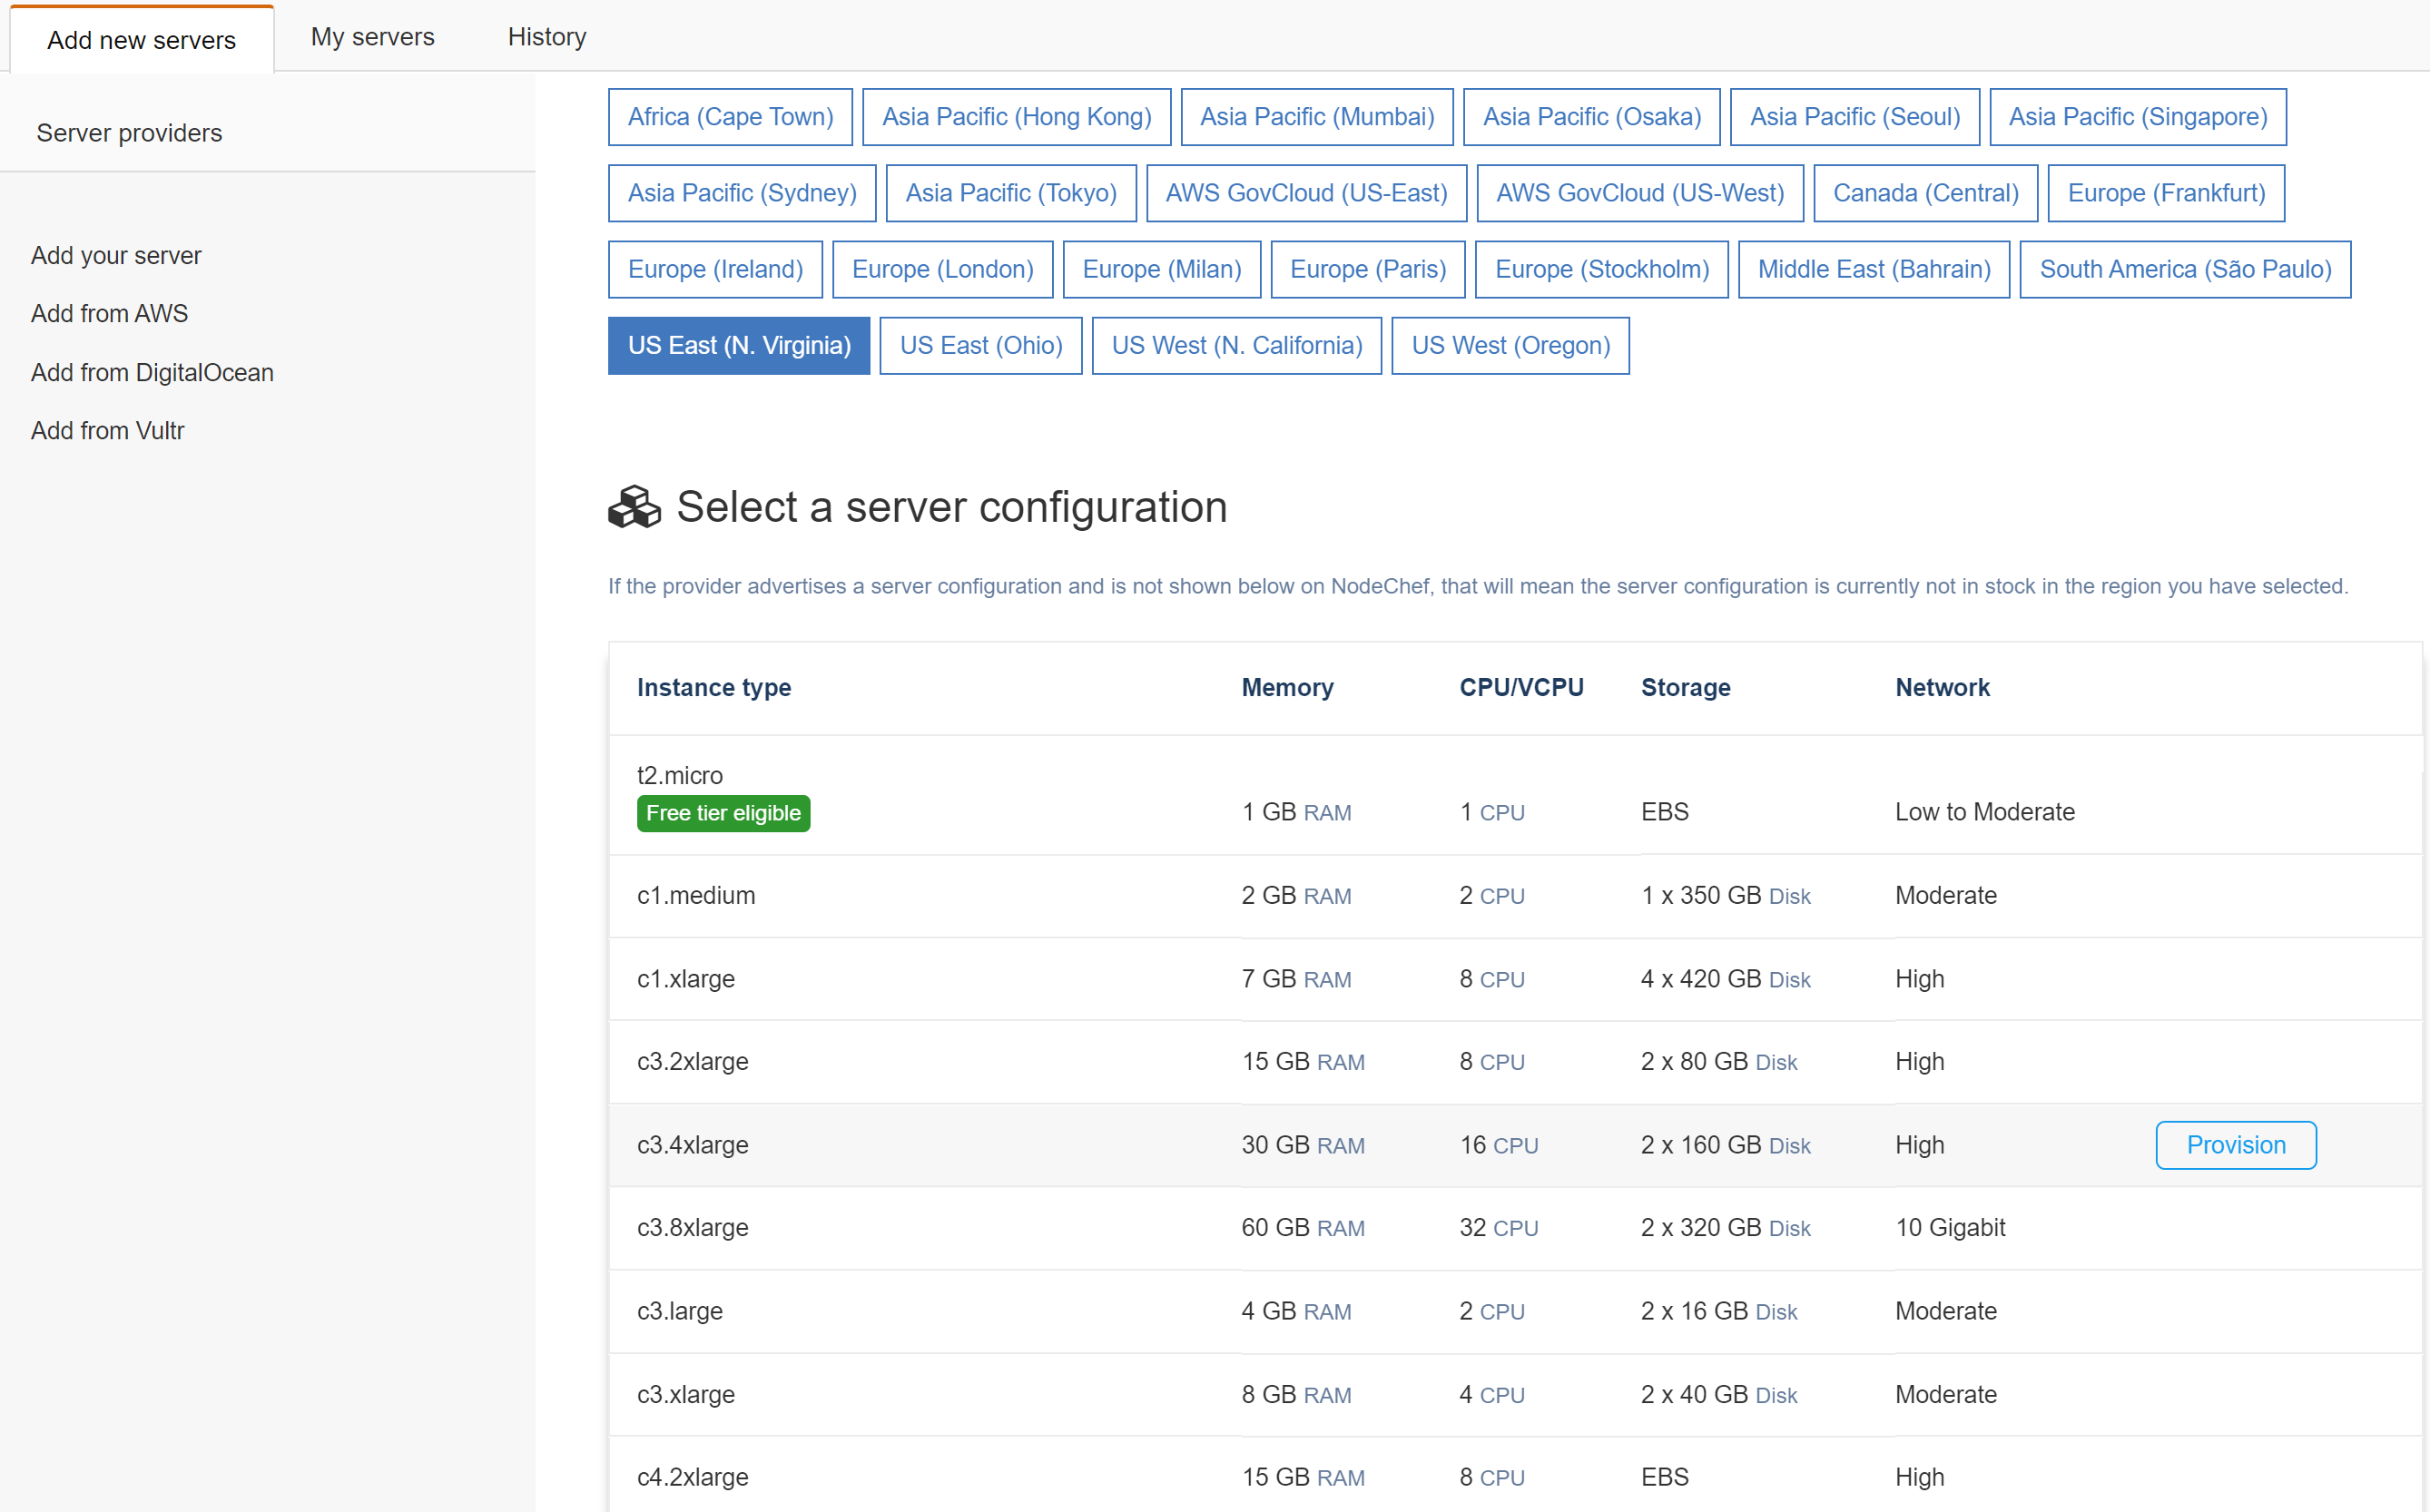
Configure storage requirements and other requirements on the provision form as seen below.

Under the role section, select database only for this server.

Click on the deploy servers button to initiate the provision of the server on your cloud account. You can see the progress of the server provisioning under the history section as show above.
Provision your first replica set or standalone instance to your servers.
From the dashboard, click on deployments → deploy database only. Give your database a name and then select the memory limit this database can use on your server. You can select the highest if you are hosting only a single instance on the server. Note, you are not billed by the memory usage of your database instance since you own the server.
Select MongoDB as the database engine. Select the storage engine and then select the replication setup you want. Under the hosting location section. Pick the name of the project name you used when adding the server under the host this database server on my own servers dropdown. Do not select any of the NodeChef datacenters.
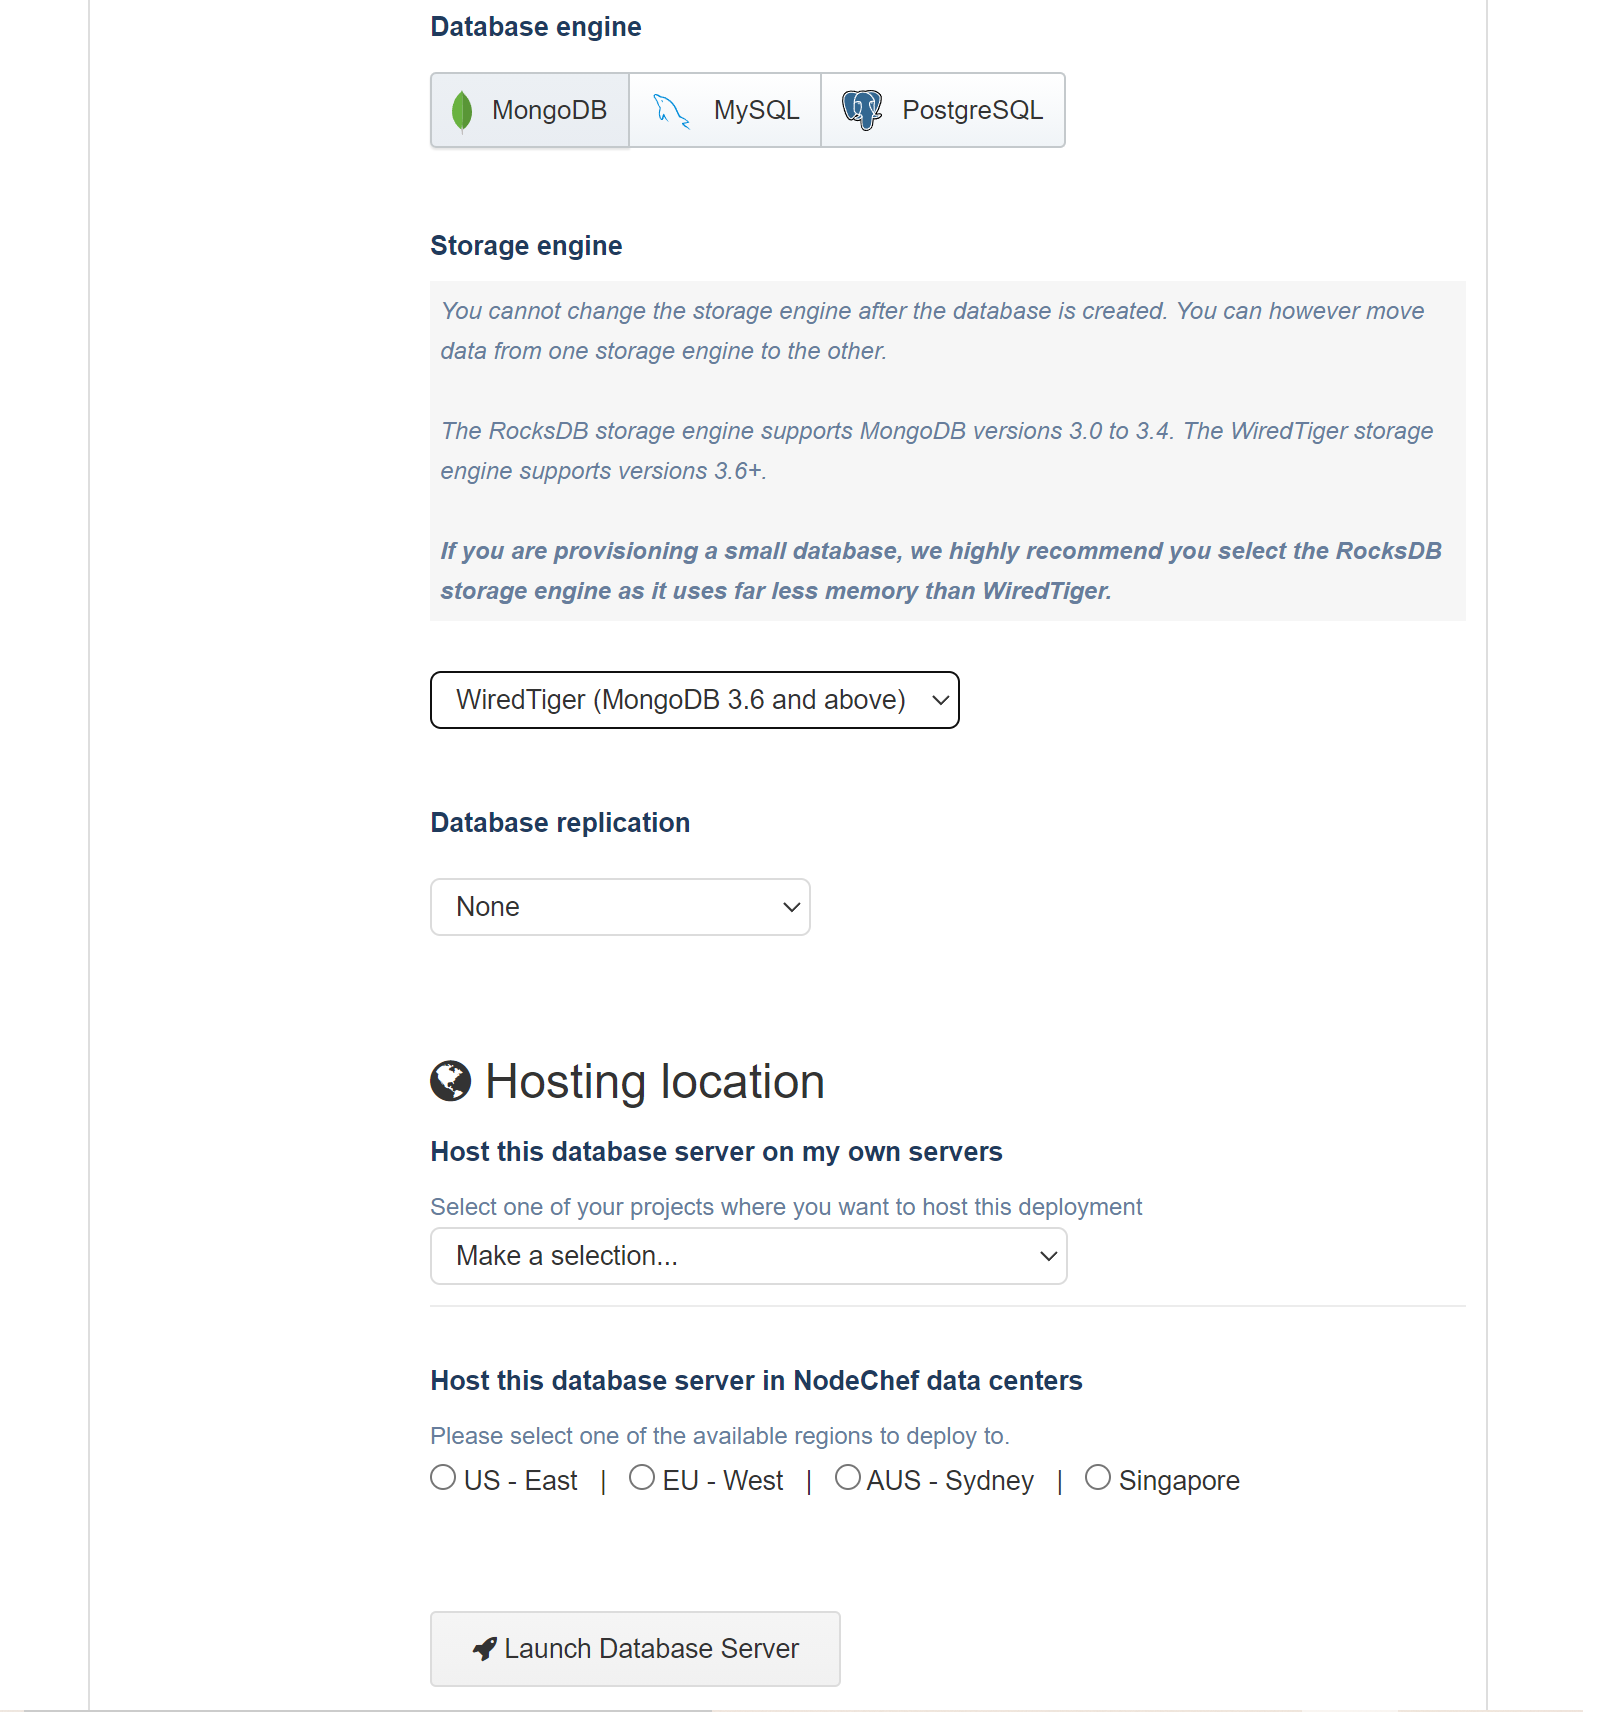
Launch the database. You can view the status of the database creation under the Deployments → History section. After the history section shows the request is ready, you should see your database from the Task manager listed as running.
For more information on backups, migrating data, slow query profiling, SSL connections and many more, you can simply review our MongoDB hosting documentation here.